iOS 101: Day 0 | Setting up the garage
Welcome to your first tutorial for iOS 101! Learn how to setup development environment on your Mac before you start shipping out kickass iOS apps. Dive in!
 Jatin Kumar Malik First published on
 BitSnapper
Hello folks! Welcome to your first tutorial for iOS 101. Before starting with today’s tutorial let me just tell you about myself. My name is Vikas Soni and I am working as an iOS developer in Appster. It’s an Australian startup founded in 2011. The office is located in Udyog vihar, Gurgoan. Well, I have decided to write a series of Tutorials for iOS Application Development. For all those who want to develop apps for iOS platform by Apple but think that its way too tough or requires a lot of coding experience? Well, let me just help you and make it easy for you to get started. So, stick with me and let me know if you need any assistance in comments below and by end of this series you will be at least proficient enough to build a family of iOS apps to get your mind horses running at full pace.
Disclaimer: I will be writing this series while keeping iPhone 6 as the de-facto device, so if you want to develop for iPad or so, the experience may vary.
Prerequisites!
Well, to develop an application for an iOS platform you must have the following:
- An Apple iPhone device (better if running on latest iOS 8.4)
- An Apple developer account
- An Apple Mac machine ( iMac or Macbook Mini/Pro/Air )
- Xcode or Appcode installed on that machine.
- Creativity with a pinch of common sense.
Why iOS development?
Here is a nice visual cue for evolution of Apple iPhone family till now..
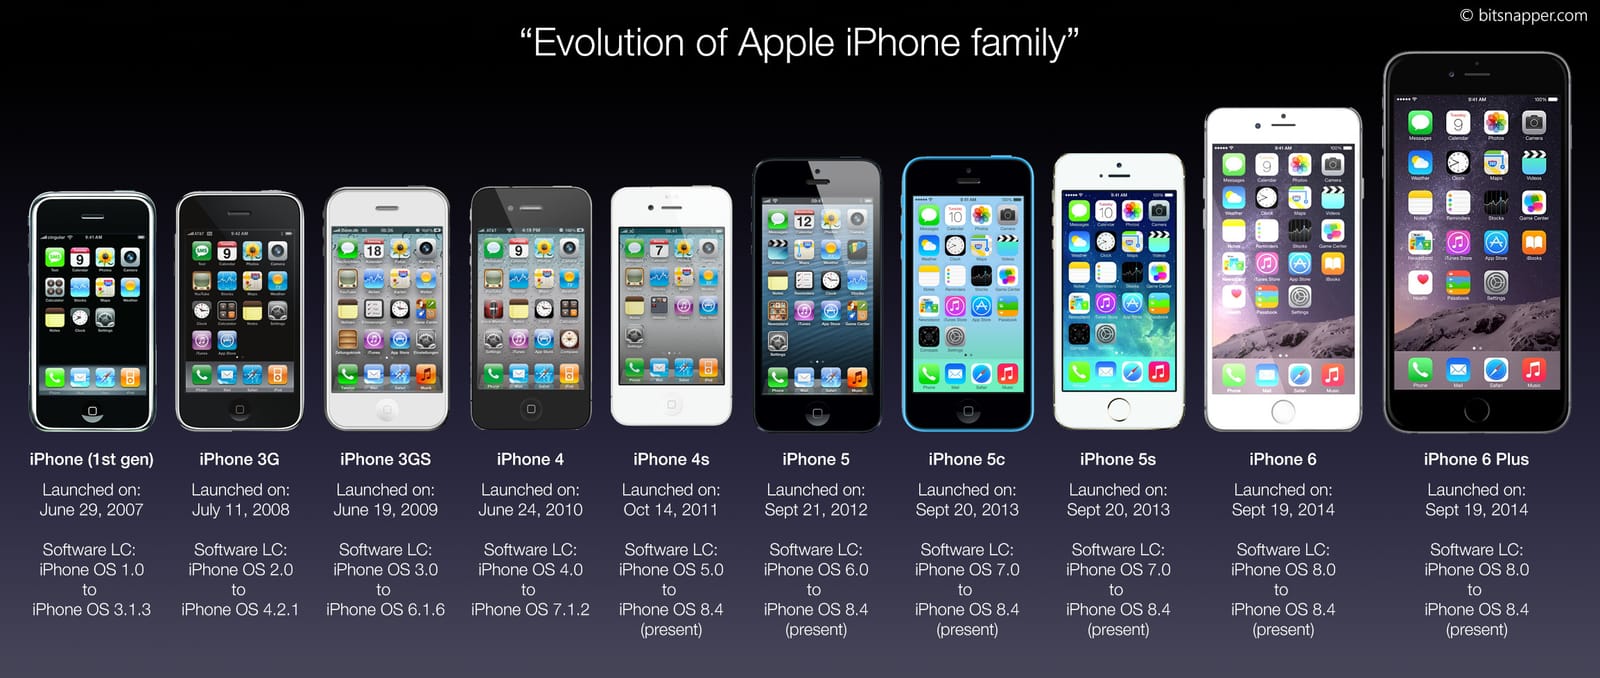
8 years and so on..
Well, there are number of mobile operating system(s) present in the market right now but with all due respect Apple is just not another name in the mobile market . Even since launch in 2007, Apple’s iOS platform has been the class leader in terms of User experience for mobile devices while other OSes have played a catch up. iOS has made a name of itself and has set a benchmark for other OSes. True, there is always a debate about iOS v/s Android but since I am an Apple fanboy, I will definitely jump ships for iOS.
Here is an interesting fact about iOS: Every new generation of iPhone comes up with a new iOS version (as seen in visual cue above)!
Historically, Apple iOS apps have been more valuable to developers. Let’s take a look at some factors driving this tendency. From the developer’s standpoint, it is often best to compare similar apps and their profitability on respective platforms instead of comparing the total value of each platform. Apple is usually viewed by start-ups as the ideal platform to design for due to its larger and more affluent customer base.
Xcode - Why and how?
Apple provides it’s own IDE called XCode for both iOS and Mac OSX development. This is why there is a unique requirement of Xcode to own a Mac machine if you want to start developing iOS applications as Windows OS is not supported. Also, unlike Android you don`t need to download SDK for every version separately, as whenever Apple releases a new iOS version it also updates Xcode automatically to bundle the latest iteration of iOS SDK with it.
Let us start with the setup now. We have 2 ways to download and install the Xcode IDE.
Using GUI:
Step #1:
- Click here to download Xcode.
Step #2:
- Once the download completes, you can open it and here is how it will look like.
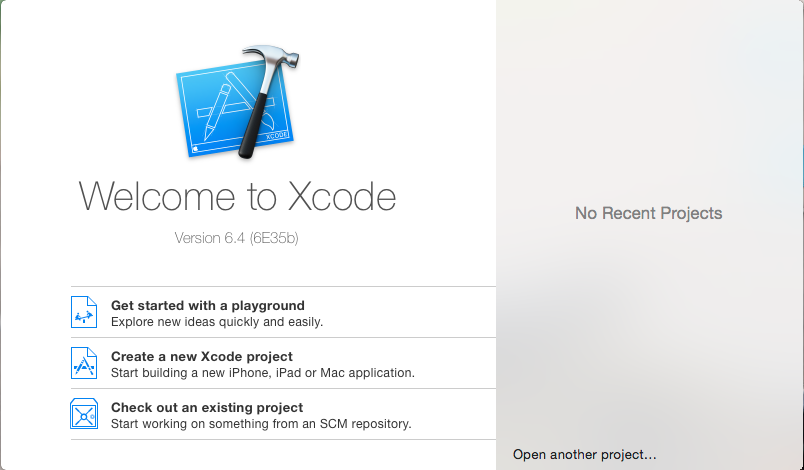
Welcome!
Using Terminal:
We can also install the Xcode using command line of OSX. Just open the terminal and do the following steps.
Step #1:
- Type $ gcc in terminal
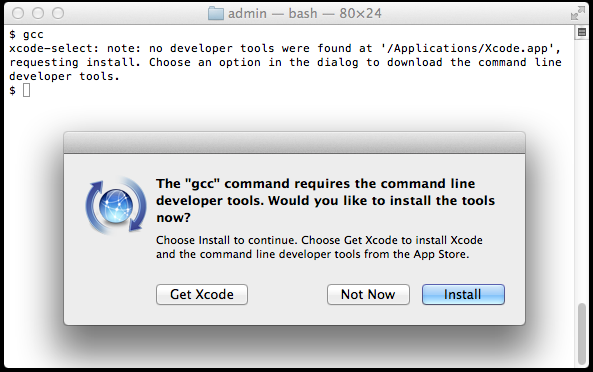
Doing it the bash way ;)
Step #2:
- Click “Install” to download and install Xcode Command Line Tools.
OR
Step #1:
-
Use the command $ xcode-select —install to directly install it via Terminal.
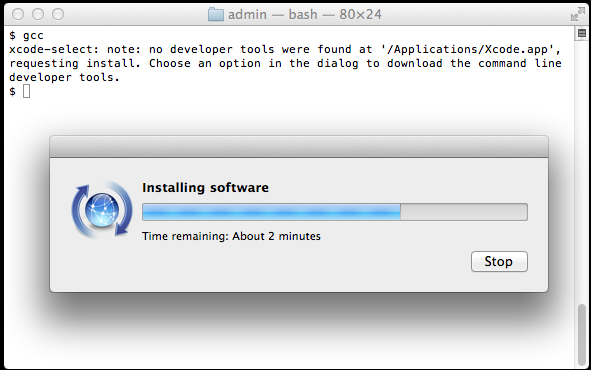
Installing it directly
Note: The instructions in the alert box may get confusing. You don’t need to “Get Xcode” from the App Store. Just click “Install” for the Xcode Command Line Tools and it will do the dirty work for you.
Installing the simulator
After downloading and installing the Xcode, we have to install the simulator. Simulator? Now what is this? Well, let’s say that it is a virtual iPhone device in your machine which will open up on your screen and behave like an iPhone. Of course, it’s performance and accuracy will vary in comparison with a real device but rest assured it’s reasonably faster and is more accurate than an Android simulator ;)
Follow the steps below to install the Simulator in your Xcode:
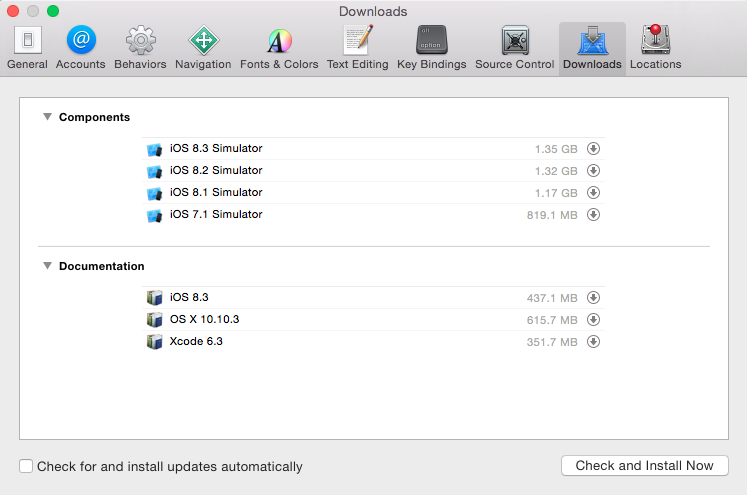
- Open the Xcode and on the top left corner go to Xcode -> Preferences -> Downloads
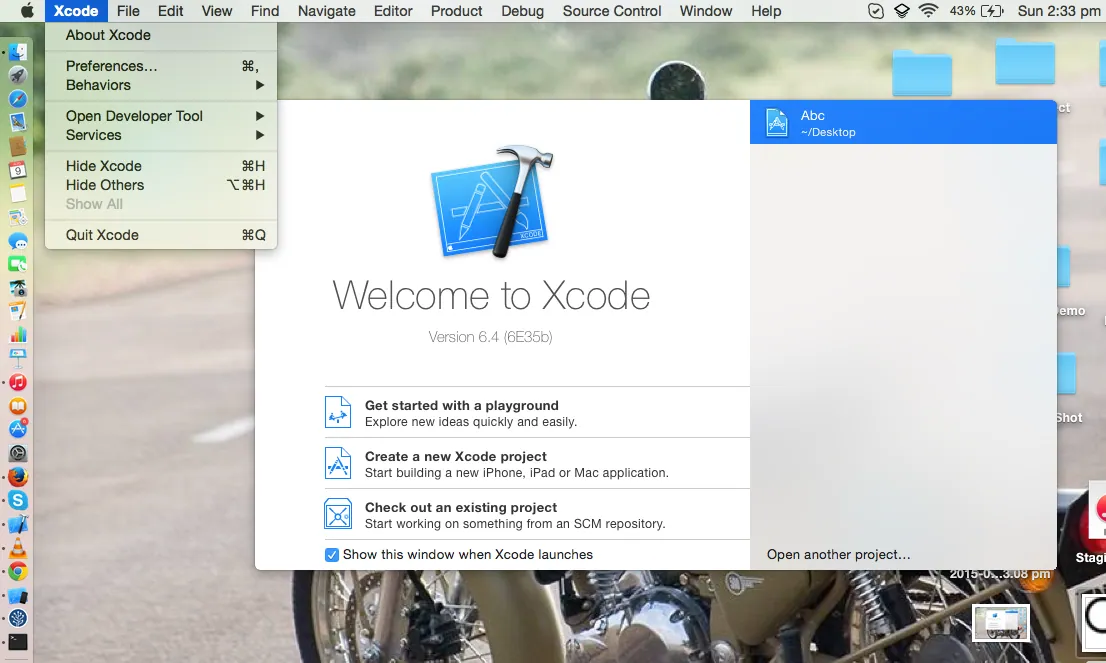
- Click on Check and Install now button and that is all you have to do. It will automatically set up all the available simulators for you to start and develop your First iOS Application.
Ready? Set. Go iOS 101!
-
Open yourXcode and you will have something like this in front of you.
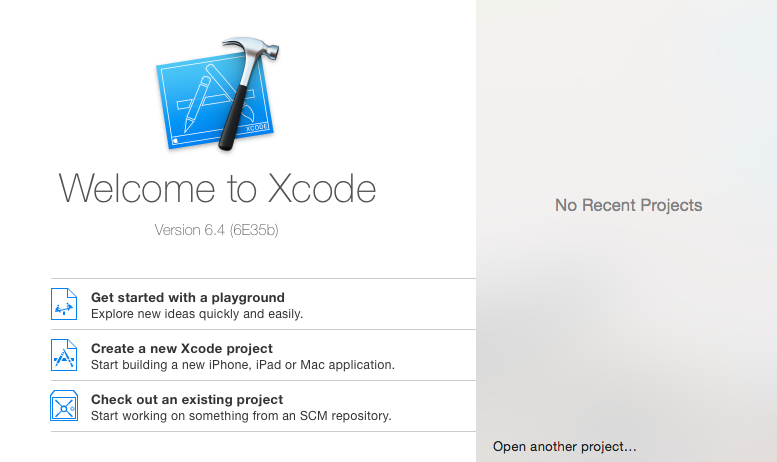
Not so fast.. Chief! -
Click on create new Xcode Project and…………. well we will continue from here in the next tutorial… 😎
Hope you enjoyed our Pilot post for iOS 101. Let us know your feedback and suggestion below. We will be soon posting the next post where you will get to do a hands-on experiment and create your first app. Cheers.
Keep reading
From Vocalinux to the Voca family: a Mac port, a phone app and three app stores
Porting Vocalinux to macOS, moving it all into one Voca org, and pushing VocaPhone through Google Play, the App Store and F-Droid in a single autumn.
How to set a custom ringtone on Apple iPhone via iTunes v12?
Discover how to set your favourite ringtone on your Apple iPhone in 6 super-easy steps! It won't even take you >120 seconds to get going, We promise!
Eye strain? No more! Install this app to save your eyes.
Are you among those folks who use the computer at night and suffer from eye strain or sleep deprivation? Well, I just found an app to sort it out for you.
Leave a comment