Android 101 : Day 2 | Approaches In Android
In this post you will discover how to create a 'Simple Toast Application' using both XML and JAVA Approaches In Android Application development. Learn now!
 Jatin Kumar Malik First published on
 BitSnapper
Hi guys, this is our Third Tutorial for Android Application Development and today we’ll be Building a “Simple Toast Application” using different Approaches in Android. In our last Tutorial, we learnt how to Build and test an Application on an Android Device. Before moving further, you should be aware of a few Directories and Files in the Android Project…
Components Of Android Application Project
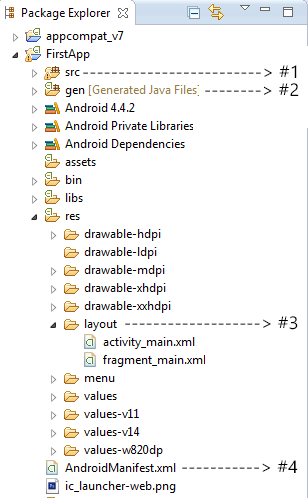
#1. src
This contains the .java source files for your project. By default, it includes a MainActivity.java source file having an activity class that runs when your application is launched.
#2. gen
This contains the R.java file, a compiler-generated file that references all the resources and controls found in your project. This file must not be modified
#3. res/layout
This is a directory for files that define your app’s user interface. All the designing part of the application is done in layout. (We’ll be designing our Applications inside activity_main)
#4. AndroidManifest.xml
This is the manifest file which describes the fundamental characteristics of the app and defines each of its components.
Approaches In Android
Application Development in Android basically includes :
- Designing of Layout
- Designing of View Controls(Buttons, TextViews etc)
- Text for every specific Control
- Event Handling
- Business Logic for our Application
In Android, there are basically 3 types of Approaches for designing an Application :
- XML Approach
- Java Approach
- Hybrid Approach (XML + JAVA)
Now, every Developer can have its own Approach for designing Applications but we’ll be using the most common one, that is the Hybrid Approach (Text, Event Handling in Java & Designing in XML). However today we’ll be designing a Simple Toast Application using XML and Java Approach so as to find out differences between all three Approaches.
But wait! What is a Toast ?
Toast is nothing but a Pop up, that can be displayed when an event occurs.
In our Application, we will display some Toast message on a Button Click. To display a toast message, we use a predefined class Toast.
The Toast.makeText() method is a factory method which creates a Toast object. It takes 3 parameters :
Toast.makeText(Context, Text, Duration)Context : The activity within which the toast has to be displayed
Text : The toast message that has to be displayed
Duration: The set time for which the Toast has to be displayed
The Toast.makeText() method returns an object and the Toast is displayed on the screen using the show() method.
Well, that’s enough theory for today. Let’s start building our Application!
XML Approach
Following are the steps to Create a Simple Toast Application using XML Approach :
-
Create a New Android Application Project.
>> Open File > New > Android Application Project >> Configure Project and click on Next >> Configure Launcher icon and click on Next >> Configure Activity and click on Next
>> Enter Activity & Layout name (XmlActivity.java&activity_xml.xml) and click on Finish (Having Problems ?! Learn to Create a new Android Application Project from our Last Tutorial) -
As we’re using the XML approach, we’ll perform Event Handling and Designing inside our xml file .
NOTE : Business Logic is the executable code and hence it’s always coded inside our Java file. This is because xml is a parsable language while java is the executable one.activity_xml.xml :
activity_xml.xml
<RelativeLayout xmlns:android="http://schemas.android.com/apk/res/android"
android:layout_width="fill_parent"
android:layout_height="fill_parent" >

<TextView
android:id="@+id/textView1"
android:layout_width="wrap_content"
android:layout_height="wrap_content"
android:layout_alignParentTop="true"
android:layout_centerHorizontal="true"
android:layout_marginTop="28dp"
android:text="Simple Toast Application"
android:textAppearance="?android:attr/textAppearanceLarge" />

<Button
android:id="@+id/button1"
android:layout_width="wrap_content"
android:layout_height="wrap_content"
android:layout_below="@+id/textView1"
android:layout_centerHorizontal="true"
android:layout_marginTop="81dp"
android:text="Show Message"
android:onClick="showMessage" /> <!-- onClick property specified -->

</RelativeLayout>
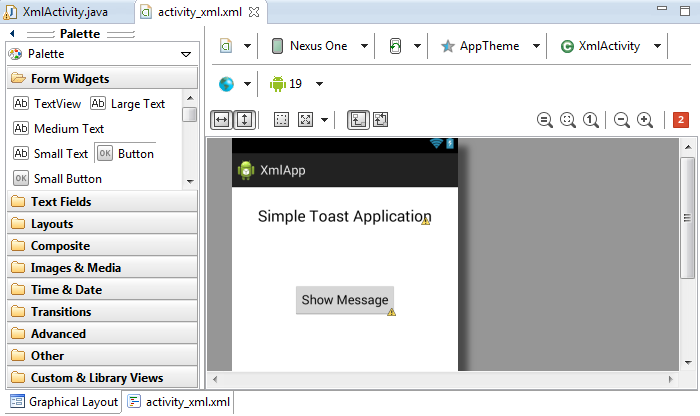
Graphical Layout :
XmlActivity.java
XmlActivity.java
package rajat.xmlapp;

import android.support.v7.app.ActionBarActivity;
import android.support.v7.app.ActionBar;
import android.support.v4.app.Fragment;
import android.os.Bundle;
import android.view.LayoutInflater;
import android.view.Menu;
import android.view.MenuItem;
import android.view.View;
import android.view.ViewGroup;
import android.widget.Button;
import android.widget.Toast;
import android.os.Build;

public class XmlActivity extends ActionBarActivity {

@Override
protected void onCreate(Bundle savedInstanceState) {
super.onCreate(savedInstanceState);
setContentView(R.layout.activity_xml);
}

// The showMessage method receives View properties which are stored in object v.
public void showMessage(View v)
{
//Business Logic
Toast.makeText(this,"Hi. I am a welcome text", Toast.LENGTH_LONG).show();
}
}
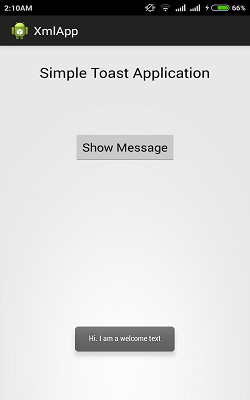
Here is a screenshot of the XmlApp :
Java Approach
Following are the steps to Create a Simple Toast Application using Java Approach :
-
Create a New Android Application Project.
-
In Java Approach, we’ll perform Event Handling and Designing of the App inside MainActivity.java.
MainActivity.java :
MainActivity.java
package rajat.javaapp;

import android.support.v7.app.ActionBarActivity;
import android.support.v7.app.ActionBar;
import android.support.v4.app.Fragment;
import android.os.Bundle;
import android.view.LayoutInflater;
import android.view.Menu;
import android.view.MenuItem;
import android.view.View;
import android.view.View.OnClickListener;
import android.view.ViewGroup;
import android.widget.Button;
import android.widget.EditText;
import android.widget.LinearLayout;
import android.widget.Toast;
import android.os.Build;
//After Implementing On Click Listener Press ctrl + 1 on MainActivity and add onClick method.
public class MainActivity extends ActionBarActivity implements OnClickListener {

@Override
protected void onCreate(Bundle savedInstanceState) {
super.onCreate(savedInstanceState);

//Delete the Line I have Commented Below
// setContentView(R.layout.activity_main);

//Create an object of LinearLayout and set the Orientation
LinearLayout layout = new LinearLayout(this) ;
layout.setOrientation(LinearLayout.VERTICAL);

setTitle("My Java App"); //Setting the Title

Button b1 = new Button(this) ; // Initializing a Button, To import a View Control point the cursor on it and
b1.setText("Show Message"); // press ctrl + 1 and select Import
b1.setOnClickListener(this) ; // Set an onClickLister, and Implement OnClickListener Super Class
layout.addView(b1); // Press ctrl + 1 and Select Implement OnClickListener
setContentView(layout);
}

//The Code inside onClick method is executed as Soon as the Button is clicked upon
@Override
public void onClick(View arg0) {
// TODO Auto-generated method stub
Toast.makeText(this, "Hi is a welcome Text", Toast.LENGTH_SHORT ).show();
}
}
Here is a screenshot of the JavaApp :
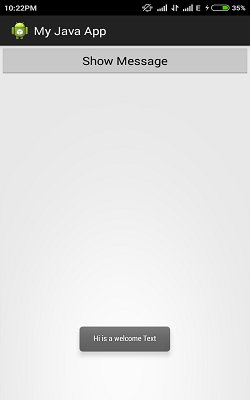
Simple Toast Application - Source code
That’s all for our Today’s Tutorial.
In our Next Tutorial, we’ll design a Caller Application using Hybrid Approach and start with Intent in Android.
So stay tuned for our next Tutorial, which will be coming out shortly. ;)
Keep reading
iRoot | Root your android smartphone with a single click!
Now root your Android smartphone using iRoot application in One click! Unlock the infinite possibilities of customization by gaining the SU (root) access.
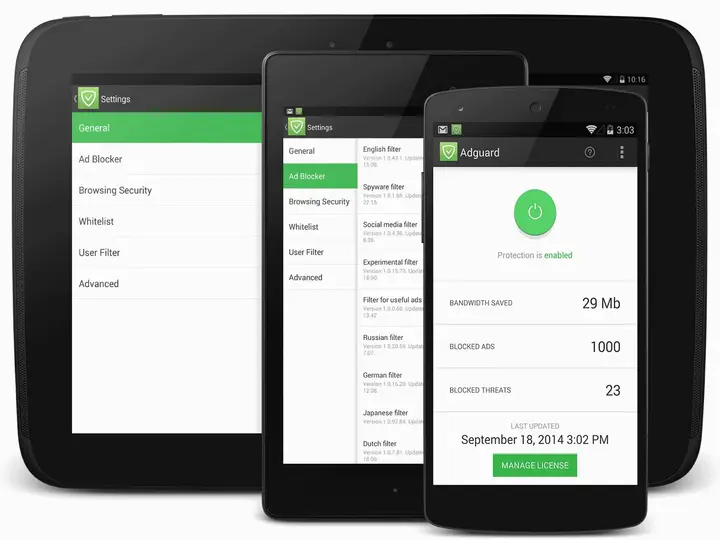
Adgaurd - An ad blocker which works without root!
Adgaurd is an ad blocker which works without root! You can block those unwanted ads on your Android devices using this application which use VPN technology.
Eye strain? No more! Install this app to save your eyes.
Are you among those folks who use the computer at night and suffer from eye strain or sleep deprivation? Well, I just found an app to sort it out for you.
Leave a comment