Android 101 : Day 3 | Hybrid Approach
In this post you'll learn, how to develop a Caller Application using Hybrid Approach and Intents in Android OS. Get your hands-on session now!
 Jatin Kumar Malik First published on
 BitSnapper
Hello everyone, this is our Fourth tutorial for Android Application Development. In the last tutorial we developed a Simple Toast Application using XML and Java Approach. Today i will explain all about Hybrid Approach and finally we’ll design a Caller Application in Android using Intent. In our next tutorial we’ll be covering Intent In Android in depth, however today i’ll explain the concept of Intent in brief.
So, What is an Intent ?
An intent is just an abstract description of an operation to be performed. In simple words, Intent is a message passed in Communication between Applications. Intent is nothing but a pre-defined class inside eclipse, that allows you to use various Static Functions defined within it. Take a look at the most used Common Intents in Android.
There are basically 2 important concepts in Intent that we need to know :
- Action : It identifies the type of message which has been sent. For example, for a Caller Application we’ll use an action Action_Call.
- URI(Universal Resource Identifier) : URI identifies a resource. It is a locator and includes a URI scheme, authority, path, query and fragment by syntax. It is a unique identifier, which identifies the Action. URI for the caller funtion is “tel:“<phonenumber>.
» We will use the setData() method to pass the unique identifier URI.
Permissions
To make use of protected features of the device, we must add the appropriate Permissions. An Application requires permissions in Android when any feature in that application, adversely impacts the user experience or any data on the device.
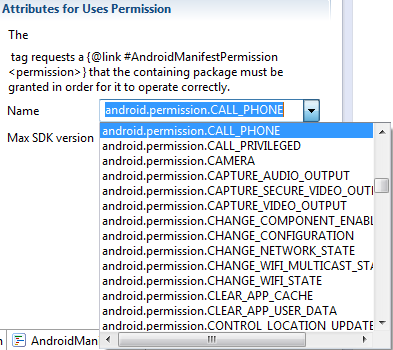
Our Application includes calling feature that impacts the call charges, therefore we will have to Add a Permission(android.permission.CALL_PHONE) in our Application.
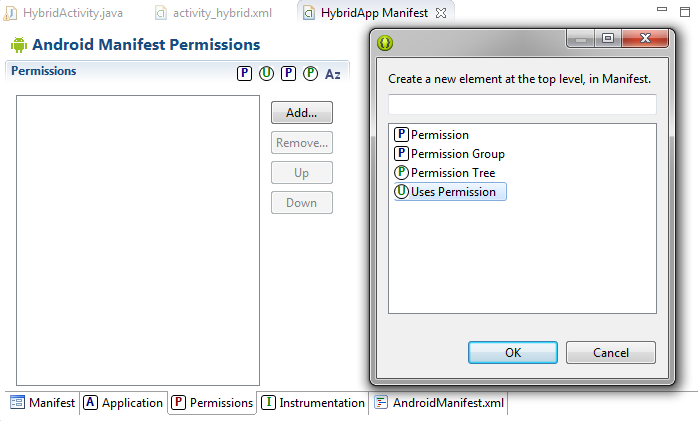
To add Permissions in Android Application follow these Simple Steps :
- Open AndroidManifest.xml.
- Go to Permissions tab.
- Click Add > Uses Permission > Ok.
- Select android.permission.CALL_PHONE from Name drop down menu.
Hybrid Approach
In Hybrid Approach, the designing of Layout, Controls & Text is done within XML, whereas Java being the executable file, Event Handling is done within it**.**
One of the very important concepts of Event Handling is that we have to Interface the Controls designed in XML to Java. To do so, we have to Refer these Controls inside Java.
To refer Controls inside java, all you have to do is remember these 3 steps :
- Set ID for each Control in Java.
- findViewById(Id of Control).
- Typecast the View Control.
Well, this is all you got to know for building a Caller Application in Android. Let’s begin developing our Caller Application.
Caller Application
Following are the steps to Create a Caller Application using Hybrid Approach :
- Create a New Android Application Project.
- We’ll start by designing our Application within XML, and then perform Event Handling within Java.
activity_hybrid.xml :
activity_hybrid.xml
<RelativeLayout xmlns:android="http://schemas.android.com/apk/res/android"
xmlns:tools="http://schemas.android.com/tools"
android:id="@+id/container"
android:layout_width="match_parent"
android:layout_height="match_parent"
tools:context="rajat.myhybridapp.MyHybridActivity"
tools:ignore="MergeRootFrame" >

<TextView
android:id="@+id/textView1"
android:layout_width="wrap_content"
android:layout_height="wrap_content"
android:layout_alignParentTop="true"
android:layout_centerHorizontal="true"
android:layout_marginTop="18dp"
android:text="This is our Caller App" />

<Button
android:id="@+id/button1"
android:layout_width="wrap_content"
android:layout_height="wrap_content"
android:layout_below="@+id/editText1"
android:layout_centerHorizontal="true"
android:layout_marginTop="61dp"
android:text="Call" />

<EditText
android:id="@+id/editText1"
android:layout_width="wrap_content"
android:layout_height="wrap_content"
android:layout_below="@+id/textView1"
android:layout_centerHorizontal="true"
android:layout_marginTop="62dp"
android:ems="10"
android:hint="Enter Number"
android:inputType="phone" >

<requestFocus />
</EditText>
</RelativeLayout>
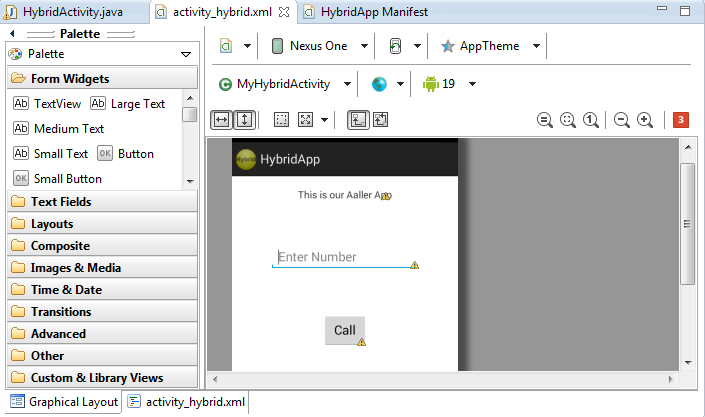
Graphical Layout :
HybridActivity.java :
HybridActivity.java
package bitsnapper.hybridapp;
import android.support.v7.app.ActionBarActivity;
import android.support.v7.app.ActionBar;
import android.support.v4.app.Fragment;
import android.content.Intent;
import android.net.Uri;
import android.os.Bundle;
import android.view.LayoutInflater;
import android.view.Menu;
import android.view.MenuItem;
import android.view.View;
import android.view.View.OnClickListener;
import android.view.ViewGroup;
import android.widget.Button;
import android.widget.EditText;
import android.os.Build;

public class HybridActivity extends ActionBarActivity implements OnClickListener {
EditText et1 ; //Setting ID
Button b1 ; //Setting ID

@Override
protected void onCreate(Bundle savedInstanceState) {
super.onCreate(savedInstanceState);
setContentView(R.layout.activity_hybrid);
et1 =(EditText) findViewById(R.id.editText1) ; // Typecasting View Control To EditText
b1 = (Button) findViewById(R.id.button1); // Typecasting View Control To Button

b1.setOnClickListener(this);
}

@Override
public void onClick(View arg0) {
// TODO Auto-generated method stub
String number = et1.getText().toString() ;

Intent callIntent = new Intent(Intent.ACTION_CALL) ; //Import Intent and use Action_Call
callIntent.setData(Uri.parse("tel:" + number)) ; // TypeCasting the string "tel:" to uri by using parse
startActivity(callIntent); //Starting the intent using startActivity(name of Intent)
}
}
AndroidManifest.xml :
AndroidManifest.xml
<?xml version="1.0" encoding="utf-8"?>
<manifest xmlns:android="http://schemas.android.com/apk/res/android"
package="bitsnapper.hybridapp"
android:versionCode="1"
android:versionName="1.0" >

<uses-sdk
android:minSdkVersion="8"
android:targetSdkVersion="19" />
<uses-permission android:name="android.permission.CALL_PHONE"/>

<application
android:allowBackup="true"
android:icon="@drawable/ic_launcher"
android:label="@string/app_name"
android:theme="@style/AppTheme" >
<activity
android:name="bitsnapper.hybridapp.HybridActivity"
android:label="@string/app_name" >
<intent-filter>
<action android:name="android.intent.action.MAIN" />

<category android:name="android.intent.category.LAUNCHER" />
</intent-filter>
</activity>
</application>

</manifest>
Caller Application - Source Code
• Caller Application - Download
With this we come to an end for our today’s tutorial. Hope you all enjoyed our Fourth Tutorial.
In the next tutorial, we’ll design a Multi-Activity Application using the concepts of Intent in Android. We’ll be back with our Fifth Tutorial in a few days, till then stay tuned!
Keep reading

iRoot | Root your android smartphone with a single click!
Now root your Android smartphone using iRoot application in One click! Unlock the infinite possibilities of customization by gaining the SU (root) access.
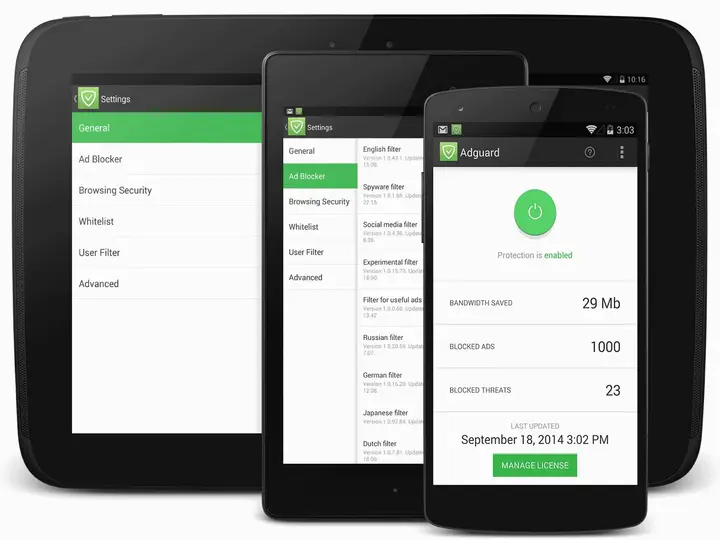
Adgaurd - An ad blocker which works without root!
Adgaurd is an ad blocker which works without root! You can block those unwanted ads on your Android devices using this application which use VPN technology.
Eye strain? No more! Install this app to save your eyes.
Are you among those folks who use the computer at night and suffer from eye strain or sleep deprivation? Well, I just found an app to sort it out for you.
Leave a comment