Android 101 : Day 4 | Intent In Android
Activities, Yay! Learn how to design a Multi-Activity App using the concepts of Intent In Android & build something great. Oh, and Source code is included!
 Jatin Kumar Malik First published on
 BitSnapper
Hi guys, Welcome to our Fifth Tutorial for Android Application Development. In our last Tutorial we designed a Caller Application using Hybrid Approach and learnt about basic concepts of Intent in Android. Today we’ll be designing a Multi-Activity App using Intent which will allow us to jump between two different activities.
As explained in our Fourth Tutorial, Intent In Android is just a message passed in communication between Applications. Before moving any further, let’s learn a few things that will be required while designing a Multi-Activity Application.
First, What is an Activity?
Activity is a Java code that supports a screen or UI. In simpler words, Activity is just like a Page for the user!
Activity is also a predefined class in Android and every application which has UI must inherit it,in order to create a window. So, we can imply that an Activity is a combination of the Java Code and XML.(Android Docs)
In our today’s Tutorial we’ll be designing an Application containing two Activities. With every new activity created, we must specify it inside our AndroidManifest.xml file as well. Let’s take a look on how to do that!
Activity Declaration In AndroidManifest.xml
Every time we create an Activity, it’s necessary to Register it inside our AndroidManifest.xml file. This is how we do it!
Inside the <application> tags add another <activity> tag using the following format :
Activity declaration snippet
<activity>
    android:name = “packagename.activityname”
    android:label = “@string/app_name”
</activity>
Okay! So we’re done with Registering our Activity inside our AndroidManifest.xml file.
We’ll design our Multi-Activity Application in such a way that we enter some data, say Name and Phone Number in first Activity, and display that data on the Second Activity. But for that we must know how to Receive and Send data between two different Activities Using Intent!
Receiving Data from Send Intent
In our last Tutorial we saw how Intent works, using Action and URI.
In today’s tutorial, we will learn how to Pass data between two different activities. Well for passing data between two activities, we should know how to Send and Receive the data.
We’ll be using a static function putExtra() with the following format to send values :
IntentName.putExtra(“key”, value) The “key” value is the unique identifier through which the value is accepted at the receiving end!
For receiving the value we use a function getIntent() that automatically creates an object of type intent using which we access the getStringExtra() function. Format for receiving values using Intent :
IntentName.getStringExtra(“key”)
So this is all we need to know for creating a Multi-Activity Application using Intent In Android!
MultiApp
Following are the steps to Create a Multi-Activity App using Hybrid Approach :
- Create a New Android Application Project.
- We’ll be creating two java files(FirstActivity.java & SecondActivity.java), and two Xml(activity_first & activity_second) files
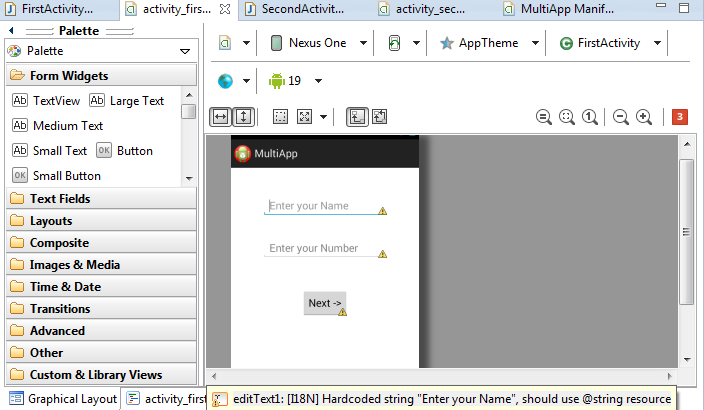
activity_first.xml
activity_first.xml
<RelativeLayout
    xmlns:android=”http://schemas.android.com/apk/res/android”
    xmlns:tools=”http://schemas.android.com/tools”
    android:id=”@+id/container”
    android:layout_width=”match_parent”
    android:layout_height=”match_parent”
    tools:context=”rajat.multipleact.FirstActivity”
    tools:ignore=”MergeRootFrame” >
    <EditText
        android:id=”@+id/editText1″
        android:layout_width=”wrap_content”
        android:layout_height=”wrap_content”
        android:layout_alignParentTop=”true”
        android:layout_centerHorizontal=”true”
        android:layout_marginTop=”47dp”
        android:ems=”10″
        android:hint=”Enter your Name” >
        <requestFocus />
    </EditText>

    <EditText
        android:id=”@+id/editText2″
        android:layout_width=”wrap_content”
        android:layout_height=”wrap_content”
        android:layout_below=”@+id/editText1″
        android:layout_centerHorizontal=”true”
        android:layout_marginTop=”36dp”
        android:ems=”10″
        android:hint=”Enter your Number” />

    <Button
        android:id=”@+id/button_next”
        android:layout_width=”wrap_content”
        android:layout_height=”wrap_content”
        android:layout_centerHorizontal=”true”
        android:layout_centerVertical=”true”
        android:text=”Next ->” />
</RelativeLayout>
Graphical Layout
FirstActivity.java
FirstActivity.java
package bitsnapper.multiapp;
import android.support.v7.app.ActionBarActivity;
import android.support.v7.app.ActionBar;
import android.support.v4.app.Fragment;
import android.content.Intent;
import android.os.Bundle;
import android.view.LayoutInflater;
import android.view.Menu;
import android.view.MenuItem;
import android.view.View;
import android.view.View.OnClickListener;
import android.view.ViewGroup;
import android.widget.Button;
import android.widget.EditText;
import android.widget.Toast;
import android.os.Build;

public class FirstActivity extends ActionBarActivity implements OnClickListener {

	EditText et1, et2;
	Button b1;

	@Override
	protected void onCreate(Bundle savedInstanceState) {
		super.onCreate(savedInstanceState);
		setContentView(R.layout.activity_first);
		et1 = (EditText) findViewById(R.id.editText1);
		et2 = (EditText) findViewById(R.id.editText2);
		b1 = (Button) findViewById(R.id.button_next);
		b1.setOnClickListener(this);
	}

	@Override
	public void onClick(View arg0) {
		// TODO Auto-generated method stub

		String name = et1.getText().toString();
		String number = et2.getText().toString();

		// if values are not entered, we display a toast
		if (name.equals("") || number.equals("")) {
			Toast.makeText(this, "Please enter the values", Toast.LENGTH_SHORT).show();
		} else {
			Intent next = new Intent(this, SecondActivity.class); // We initialize an Intent named next
			next.putExtra("NAME", name);
			next.putExtra("NUMBER", number);
			startActivity(next); //This function executes the intent and transfers the control to SecondActivity.java
			finish(); //This destroys the FirstActivity once the control is transferred.
		}
	}
}
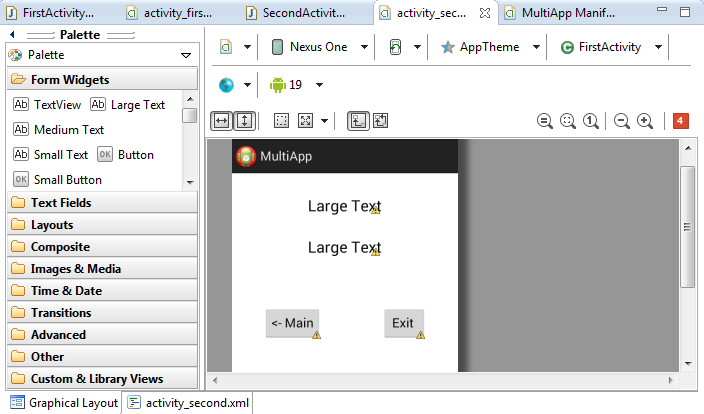
activity_second.xml
To create a new xml file :
- Right Click on Layout directory > New > Android XML file
- Enter name and select the Type of Layout and click on Finish.
activity_second.xml
<?xml version=”1.0″ encoding=”utf-8″?>
<RelativeLayout
    xmlns:android=”http://schemas.android.com/apk/res/android”
    android:layout_width=”match_parent”
    android:layout_height=”match_parent” >
    <TextView
        android:id=”@+id/textView1″
        android:layout_width=”wrap_content”
        android:layout_height=”wrap_content”
        android:layout_alignParentTop=”true”
        android:layout_centerHorizontal=”true”
        android:layout_marginTop=”33dp”
        android:text=”Large Text”
        android:textAppearance=”?android:attr/textAppearanceLarge” />

    <TextView
        android:id=”@+id/textView2″
        android:layout_width=”wrap_content”
        android:layout_height=”wrap_content”
        android:layout_alignLeft=”@+id/textView1″
        android:layout_below=”@+id/textView1″
        android:layout_marginTop=”32dp”
        android:text=”Large Text”
            android:textAppearance=”?android:attr/textAppearanceLarge” />
    <Button
        android:id=”@+id/button_exit”
        android:layout_width=”wrap_content”
        android:layout_height=”wrap_content”
        android:layout_alignTop=”@+id/button_main”
        android:layout_toRightOf=”@+id/textView2″
        android:text=”Exit ” />
    <Button
        android:id=”@+id/button_main”
        android:layout_width=”wrap_content”
        android:layout_height=”wrap_content”
        android:layout_alignParentLeft=”true”
        android:layout_below=”@+id/textView2″
        android:layout_marginLeft=”44dp”
        android:layout_marginTop=”70dp”
        android:text=”<- Main” />
</RelativeLayout>
Graphical Layout
SecondActivity.java
To create a new java file :
- Right Click on PackageName > New > Class
- Enter name of your New class and click on Finish.
SecondActivity.java
package bitsnapper.multiapp;

import android.app.Activity;
import android.content.Intent;
import android.os.Bundle;
import android.view.View;
import android.view.View.OnClickListener;
import android.widget.Button;
import android.widget.TextView;

public class SecondActivity extends Activity implements OnClickListener {

	TextView tv1, tv2;
	Button b1, b2;

	@Override
	protected void onCreate(Bundle savedInstanceState) {
		// TODO Auto-generated method stub
		super.onCreate(savedInstanceState);
		setContentView(R.layout.activity_second);

		tv1 = (TextView) findViewById(R.id.textView1);
		tv2 = (TextView) findViewById(R.id.textView2);

		b1 = (Button) findViewById(R.id.button_main);
		b2 = (Button) findViewById(R.id.button_exit);

		b1.setOnClickListener(this);
		b2.setOnClickListener(this);

		Intent receive = getIntent();
		// Receiving Values using keys
		String name = receive.getStringExtra("NAME");
		String number = receive.getStringExtra("NUMBER");

		tv1.setText(name);
		tv2.setText(number);

	}@Override
	public void onClick(View v) {
		// TODO Auto-generated method stub

		switch (v.getId()) {

			case R.id.button_main:
				Intent main = new Intent(this, FirstActivity.class);
				startActivity(main); // Will transfer the control to Main screen
				finish();

				break;

			case R.id.button_exit:
				finish();

				break;
		}
	}
}
AndroidManifest.xml
AndroidManifest.xml
<?xml version=”1.0″ encoding=”utf-8″?>
<manifest
    xmlns:android=”http://schemas.android.com/apk/res/android”
    package=”bitsnapper.multiapp”
    android:versionCode=”1″
    android:versionName=”1.0″ >

    <uses-sdk
        android:minSdkVersion=”8″
        android:targetSdkVersion=”19″ />

    <application
        android:allowBackup=”true”
        android:icon=”@drawable/ic_launcher”
        android:label=”@string/app_name”
        android:theme=”@style/AppTheme” >

            <activity
                android:name=”bitsnapper.multiapp.FirstActivity”
                android:label=”@string/app_name” >
                <intent-filter>
                    <action android:name=”android.intent.action.MAIN” />
                    <category android:name=”android.intent.category.LAUNCHER” />
                </intent-filter>
            </activity>

            <activity
                android:name=”bitsnapper.multiapp.SecondActivity”
                android:label=”@string/app_name” >
            </activity>
    </application>
</manifest>
Multi-Activity Application - Demo
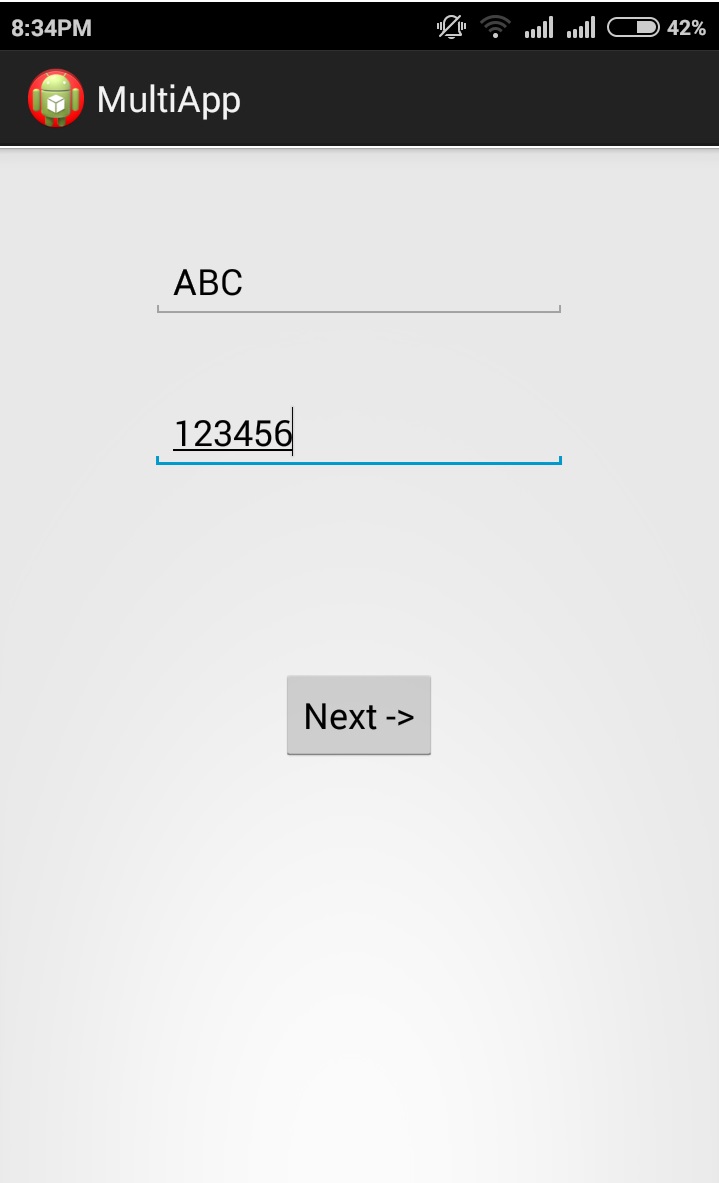
Our Multi-Activity Application consists of the following two pages displayed below :-
#1 First Page : Here we will enter the values in the Name and Number Fields.
#2 Second Page : The values entered in the first page are displayed here!
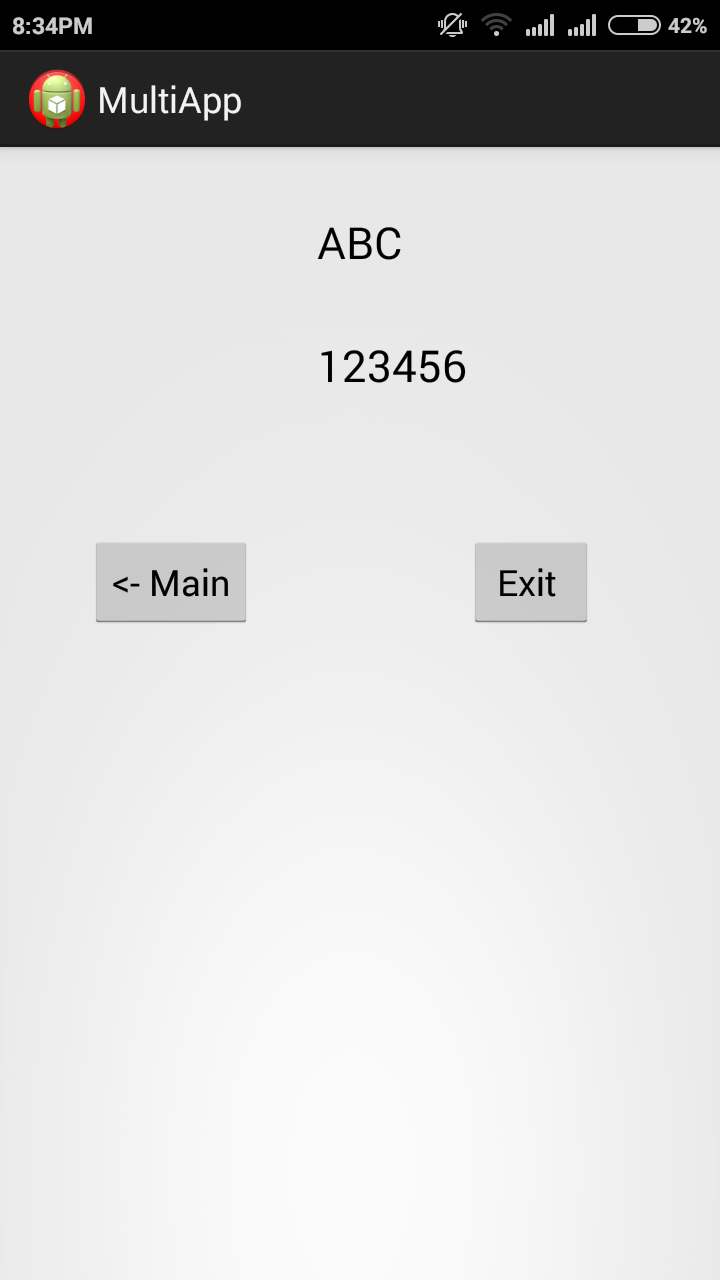
So, as you can see our Multi-Activity Application is running successfully. We’ll design more complex applications in our upcoming tutorials that will use the Concept of Intent In Android! So make sure you get all your Concepts clear. Any queries regarding the Content or Concept of Intent in particular are welcome!
Multi-Activity Application - Source Code
• Multi-Activity Application - Download
That’s all for our fifth tutorial. In our next tutorial, we will learn the concept of Server Sockets in Android and design a simple application to send and receive a message on your device! So stay tuned and in the meanwhile, build something innovative using the concept above and surprise us. Cheers 😎
Keep reading

iRoot | Root your android smartphone with a single click!
Now root your Android smartphone using iRoot application in One click! Unlock the infinite possibilities of customization by gaining the SU (root) access.
Adgaurd - An ad blocker which works without root!
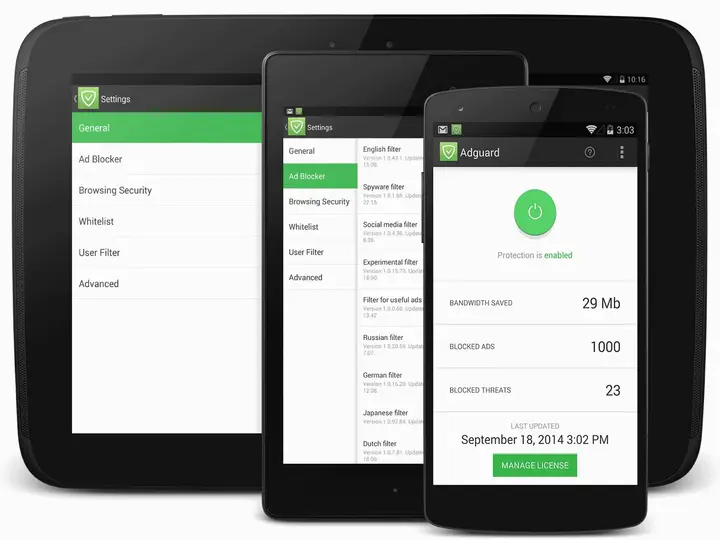
Adgaurd is an ad blocker which works without root! You can block those unwanted ads on your Android devices using this application which use VPN technology.
Eye strain? No more! Install this app to save your eyes.
Are you among those folks who use the computer at night and suffer from eye strain or sleep deprivation? Well, I just found an app to sort it out for you.
Leave a comment