A rack server with no rack: my Dell PowerEdge R510
Two Xeon X5675s, 64 GB of ECC RAM, a PERC H310 crossflashed to IT mode and a CRT for a console. My first month with a Dell R510.

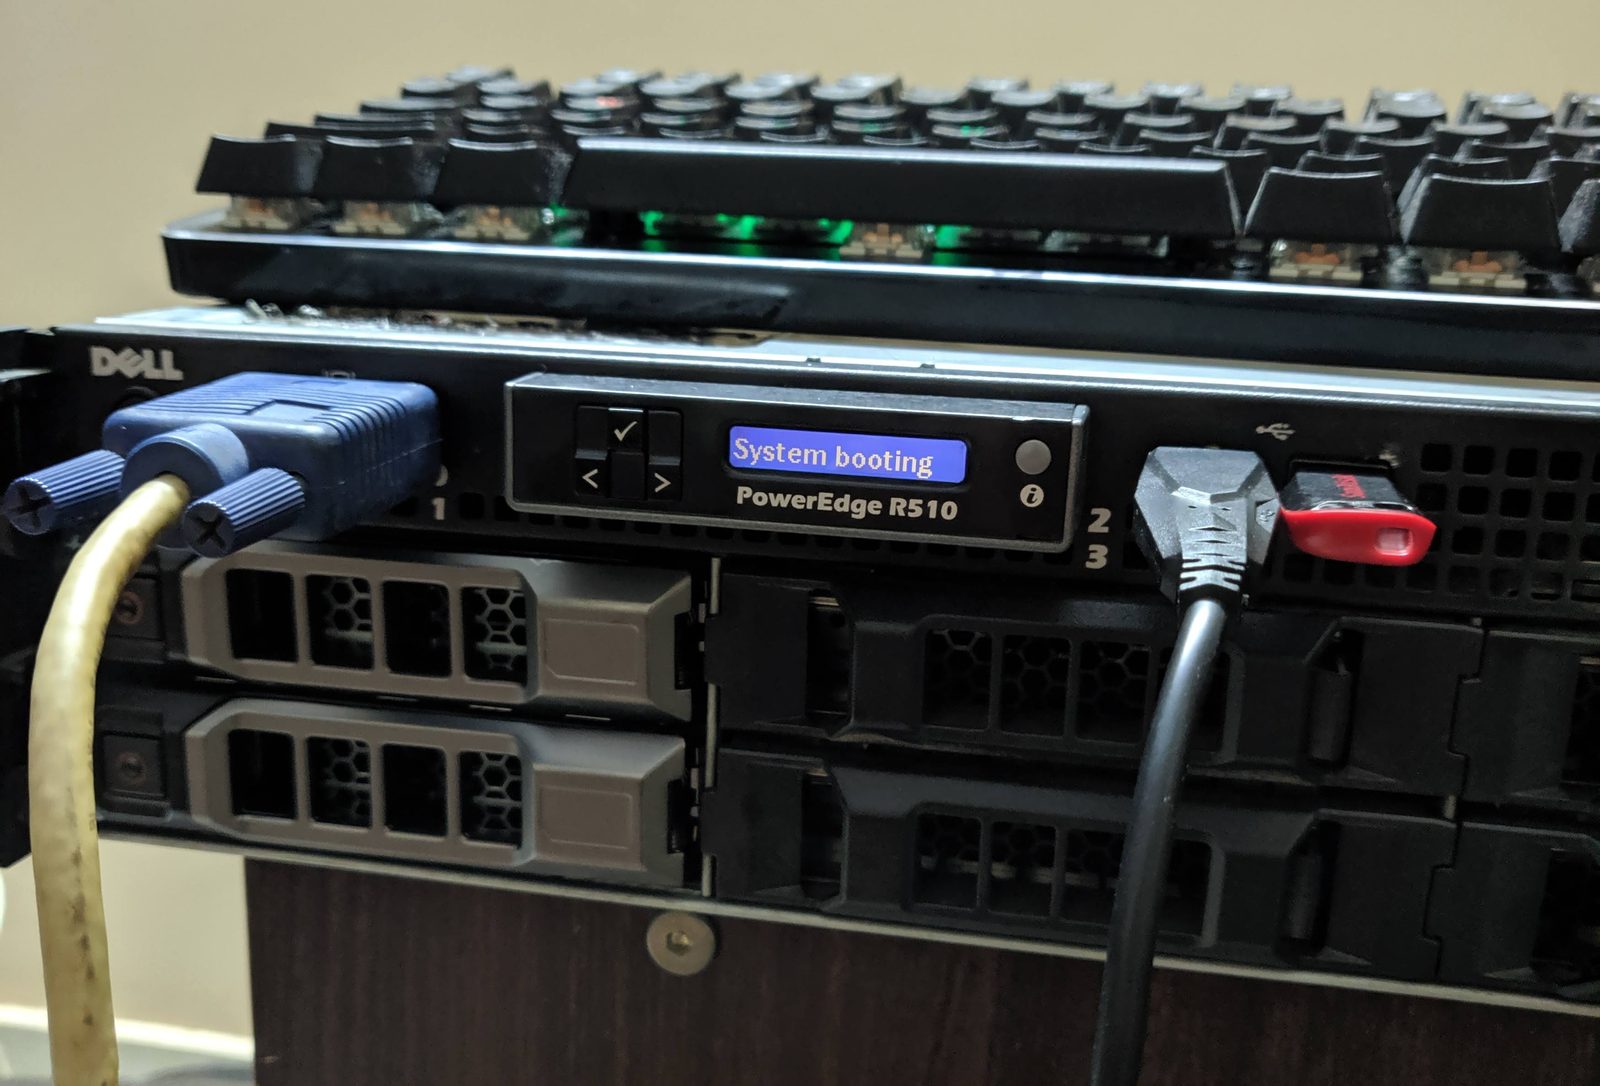
On 2 August, a Dell PowerEdge R510 booted up for the first time in my home in Delhi! Its screen? A 17-inch CRT sitting on the floor, with an RGB keyboard on my lap. That was four weeks ago, and this post is everything I’ve done with it since: what’s inside, the RAID card I crossflashed, the hypervisors I’ve been trying out and the rack I drew but don’t actually own (yet).
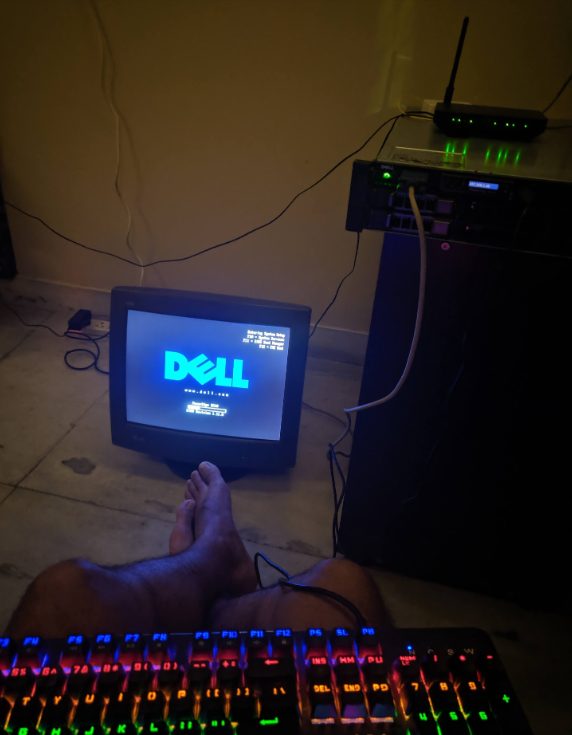 First boot, 2 August 2020: the Dell logo on the LG CRT on the floor, with the RGB keyboard on my lap.
How I got here
Back in December 2019, I asked Server Basket for quotes on a refurbished PowerEdge R710 and an R720, both 2U. Eight months later, the box sitting in my house is an R510 instead. Life, huh. I picked it up from Manali Computers, a computer hardware shop here in Delhi.
The CRT from the garage
The monitor is an old LG CRT which I dug out of the garage earlier this year. My Instagram story back then said “Fetched it out my garage. 17” // 1280x1024 // 60Hz // CRT.” The plan was to build a bartop arcade, which I talked about in my homelab talk in April. Well, the arcade hardware from Amazon never turned up, so the CRT got promoted to the R510’s console. An old server wants a VGA monitor, and this is the one I’ve got. Works for me!
First thing I ran was Dell’s own MpMemory test. The screen was VERY blue, and the last line on it said “All tests passed”. Phew.
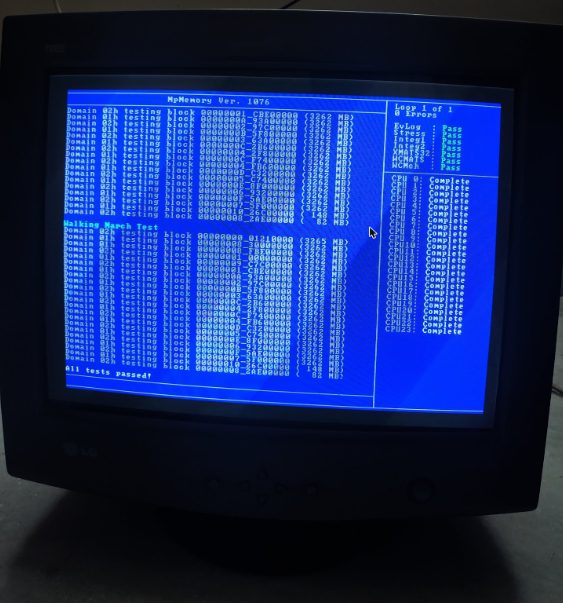 MpMemory on the CRT: every test passed.
What’s inside
- Dell PowerEdge R510, 2U, 12 drive bays at the front
- 2x Intel Xeon X5675 at 3.06 GHz, 6 cores and 12 threads each, so 12 cores and 24 threads in total
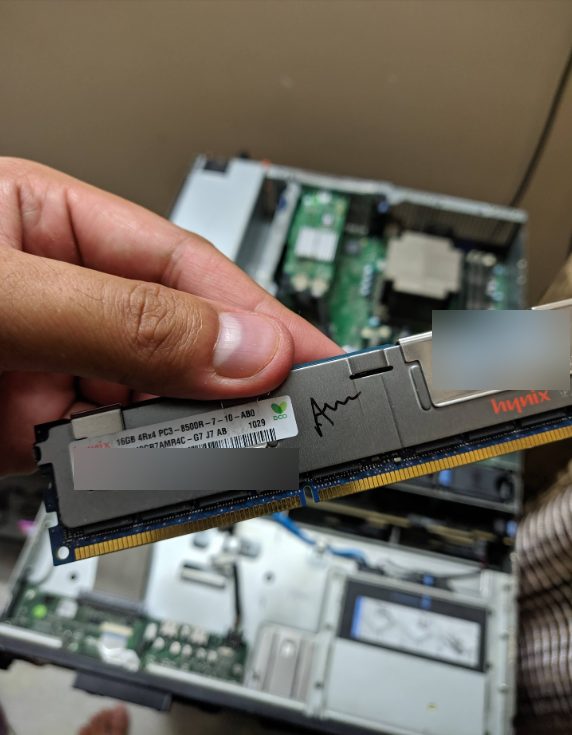
- 64 GB of DDR3 ECC RAM (the stick I photographed is a Hynix 16 GB registered DIMM)
- PERC H310 RAID controller, which didn’t stay a RAID controller for long ;)
- iDRAC6 Enterprise for remote management
The X5675 is a Westmere chip that launched in February 2011, rated at 95 W each. So yes, I now own a pair of nine-year-old server CPUs. But hey, 24 threads is a LOT for a homelab.
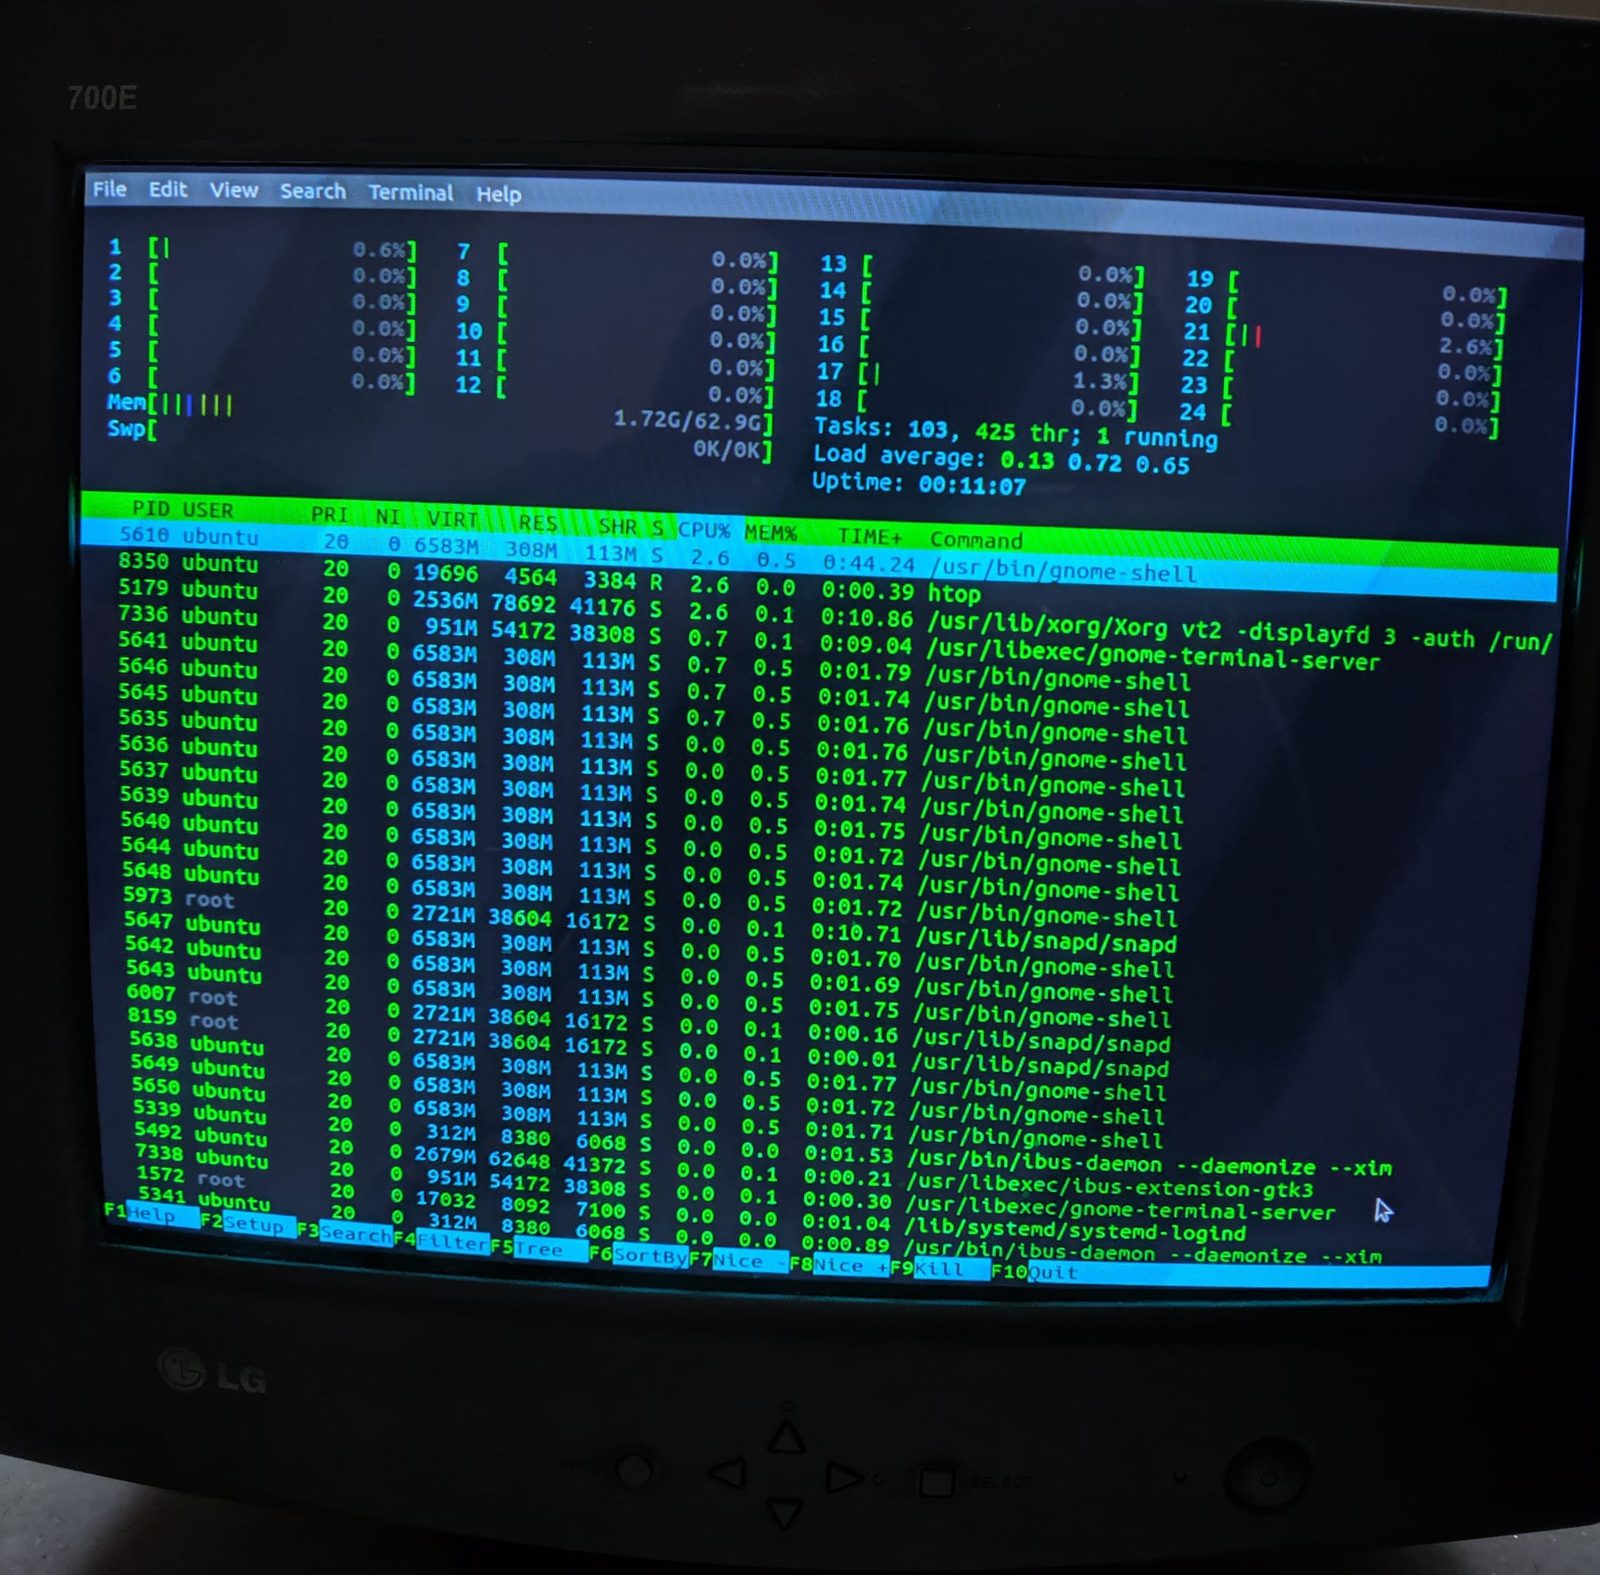 All 24 threads in htop on the CRT. My Instagram story on 3 August just said “SO. MANY. CORES.”
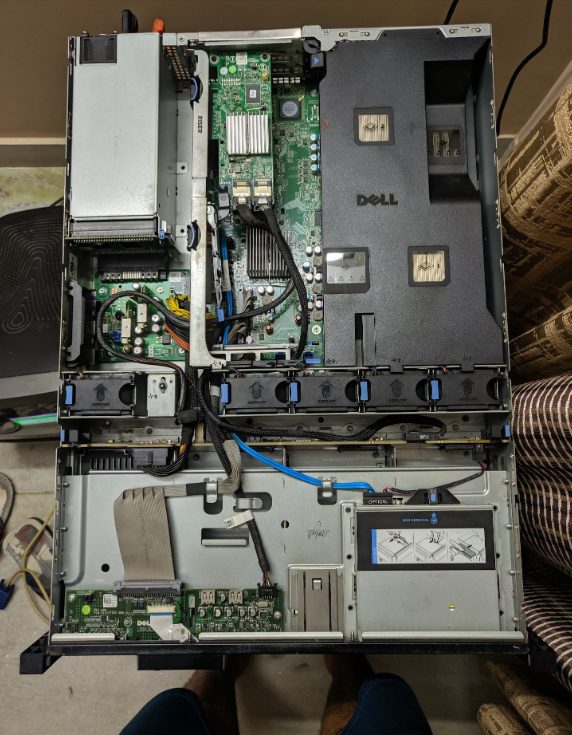
The day after the first boot, I took the lid off (obviously). From the top, you see the power supply in one corner, a big black air shroud over the CPUs and RAM, a row of fans across the middle and the drive cage at the front.
Turning the PERC H310 into a dumb HBA
Okay, this was the scary part. The H310 is a RAID controller, and I want ZFS on this box. ZFS wants to see the raw disks, but a RAID card hands it a virtual drive built out of them instead. The homelab crowd’s fix is to crossflash the H310 with LSI 9211-8i firmware in IT (initiator target) mode, so it stops doing RAID and passes every disk straight through.
It was such a nerve-wracking process, because a bad flash can leave you with a dead card. No pressure!
I followed techmattr’s guide, SAS HBA crossflashing or flashing to IT mode, Dell Perc H200 and H310 (April 2016). You boot FreeDOS from a USB stick and use the tools in the guide’s ZIP. I did it on 5 August, split across two machines: the wipe on a separate PC (the “flashing machine”), and the new firmware on the R510 itself.
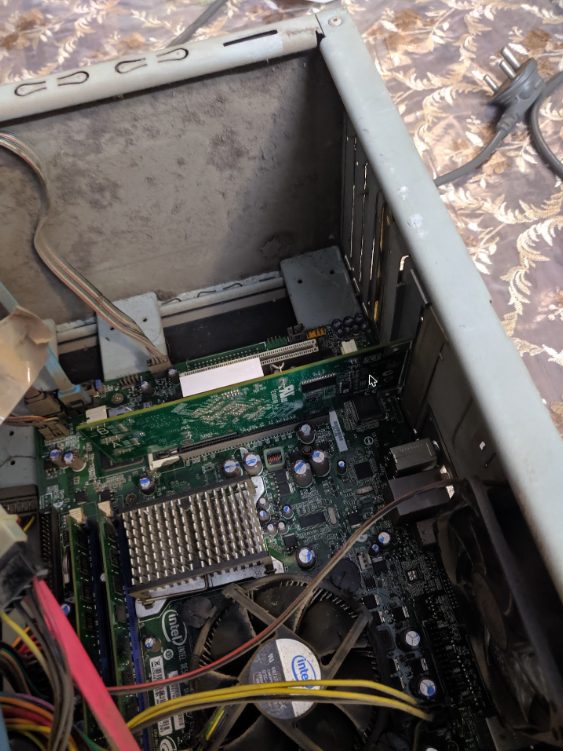 The flashing machine, an old Intel desktop with its side off.
On the flashing machine:
megacli.exe -AdpAllInfo -aAll -page 20   :: write down the SAS address
megarec.exe -writesbr 0 sbrempty.bin     :: if this fails, carry on
megarec.exe -cleanflash 0                :: then reboot
Then on the R510:
sas2flsh.exe -o -f 6GBPSAS.fw            :: Dell 6Gbps HBA firmware, then reboot
sas2flsh.exe -o -f 2118it.bin            :: LSI 9211-8i IT firmware
s2fp19.exe -o -sasadd 500xxxxxxxxxxxxx   :: put your own SAS address back
If the straight 2118it.bin flash complains, the guide’s alternative is to flash 2118p7.bin first, reboot, then run s2fp19.exe -o -f 2118it.bin.
Here’s the moment of truth on the CRT. -writesbr said “Success”, and -cleanflash was 90% of the way through erasing the 16 MB flash chip. DO NOT touch the power cable at this point!
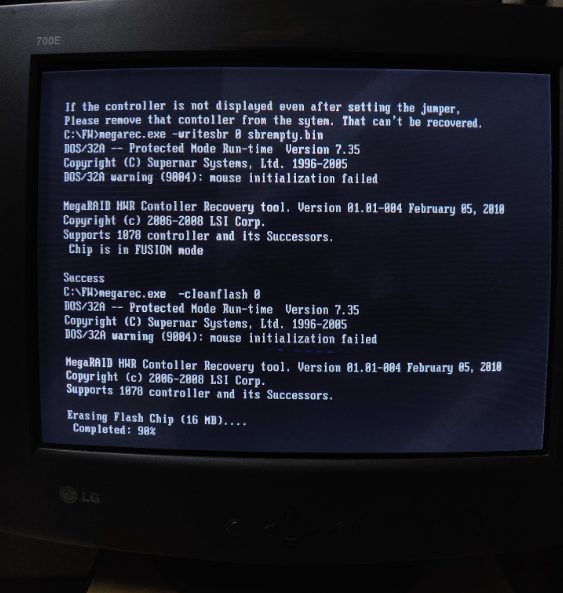 megarec -cleanflash at 90% on the CRT.
Two things from the guide worth knowing before you start. It warns against using these steps on the Integrated, Mini or Mini Mono versions of the H310. And if a desktop won’t boot with the H310 in it, cover PCIe pins B5 and B6 with a thin strip of electrical tape.
Oh, and write the SAS address down somewhere that isn’t the server, because you need it at the very end. Trust me on this one.
A rack I drew
A week after the first boot, on 9 August, I sat down and planned the whole thing properly in draw.io. A 15U rack, top to bottom: a power strip, the Airtel Wi-Fi router, a Cisco gigabit 24-port switch, a 24-port patch panel, the multifunction printer, the R510 and a UPS at the bottom. The other half of the drawing runs Ethernet points to every room. Dream big, right?
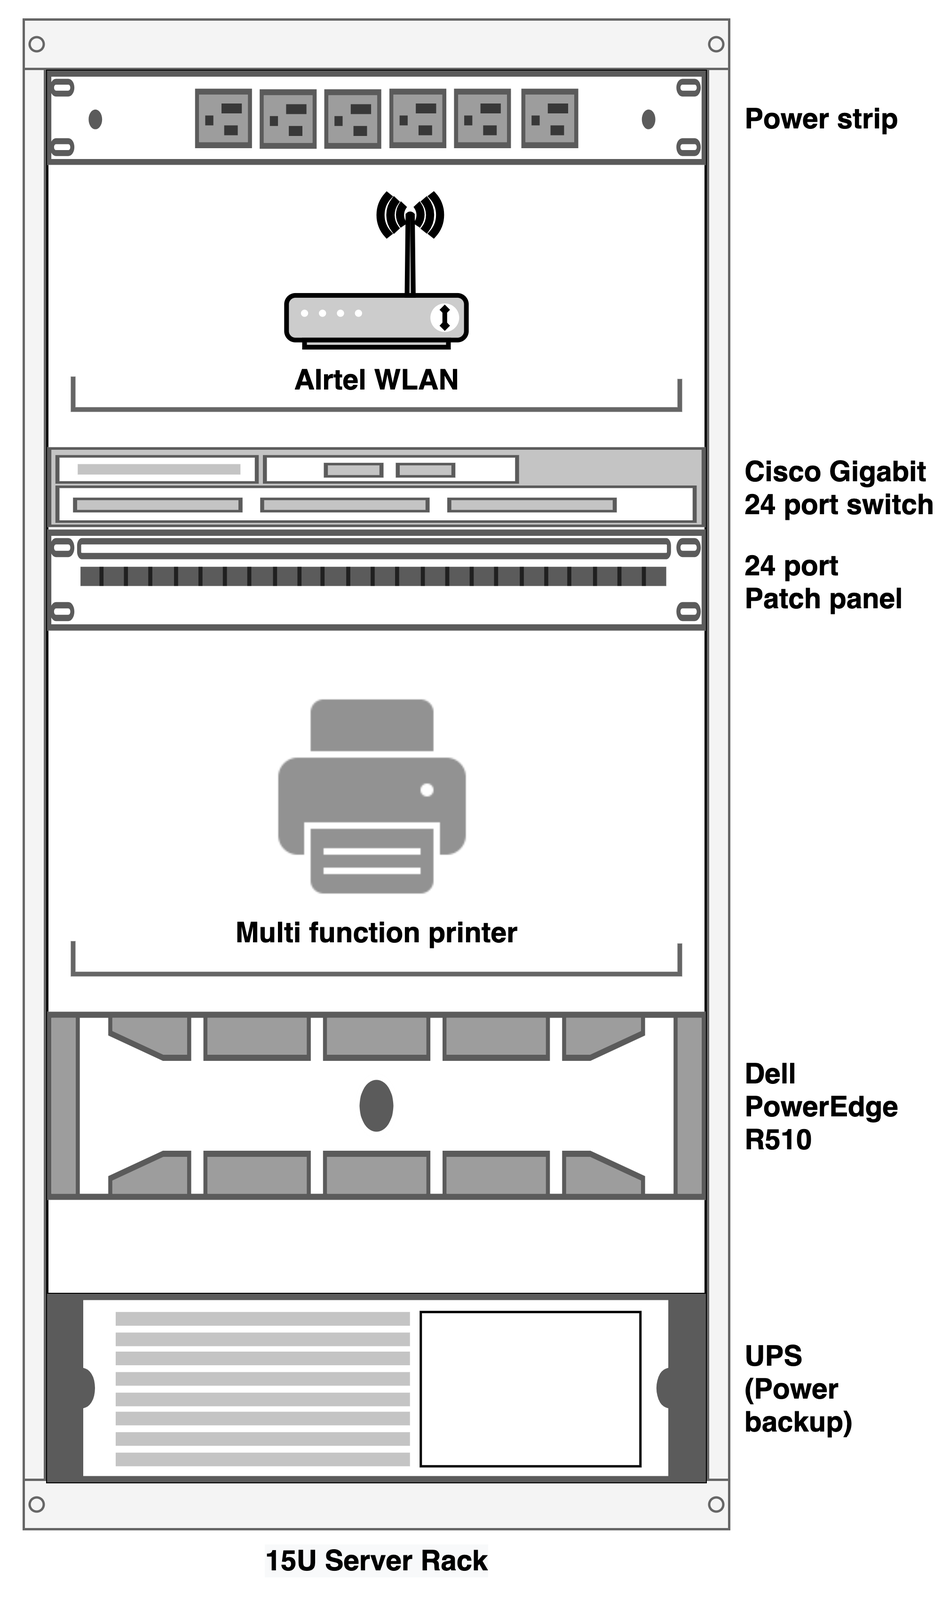 The 15U rack plan, 9 August 2020.
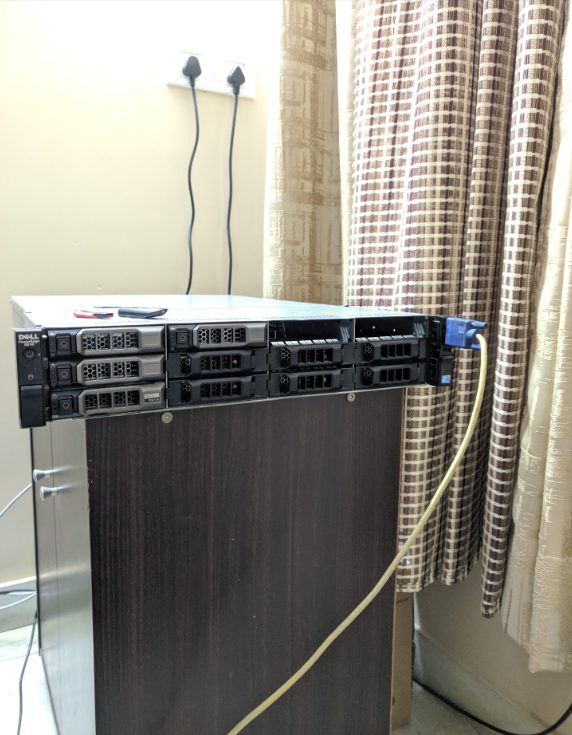
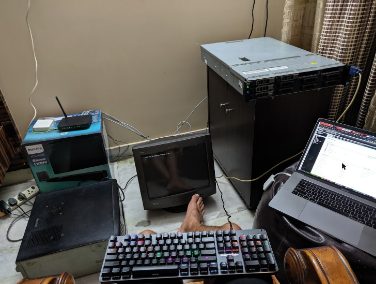
What the R510 actually has is a wooden cabinet. It was already sitting on it at first boot, with the router on top. By 25 August the router had moved to a box on the floor, and the server got the cabinet all to itself, 12 bays facing the room. The CRT is on the floor in front of it, the MacBook on a pouf and the keyboard on my lap. Very enterprise. :D
Hypervisor roulette
This is my first proper server, so for the first few weeks I’ve been trying a bit of everything on it.
ESXi went first. I installed VMware ESXi 6.5 Update 3 on 6 August, on the 60-day evaluation licence. The host summary reads: PowerEdge R510, 12 CPUs x Xeon X5675, 63.99 GB of memory, and BIOS 1.14.0 already installed.
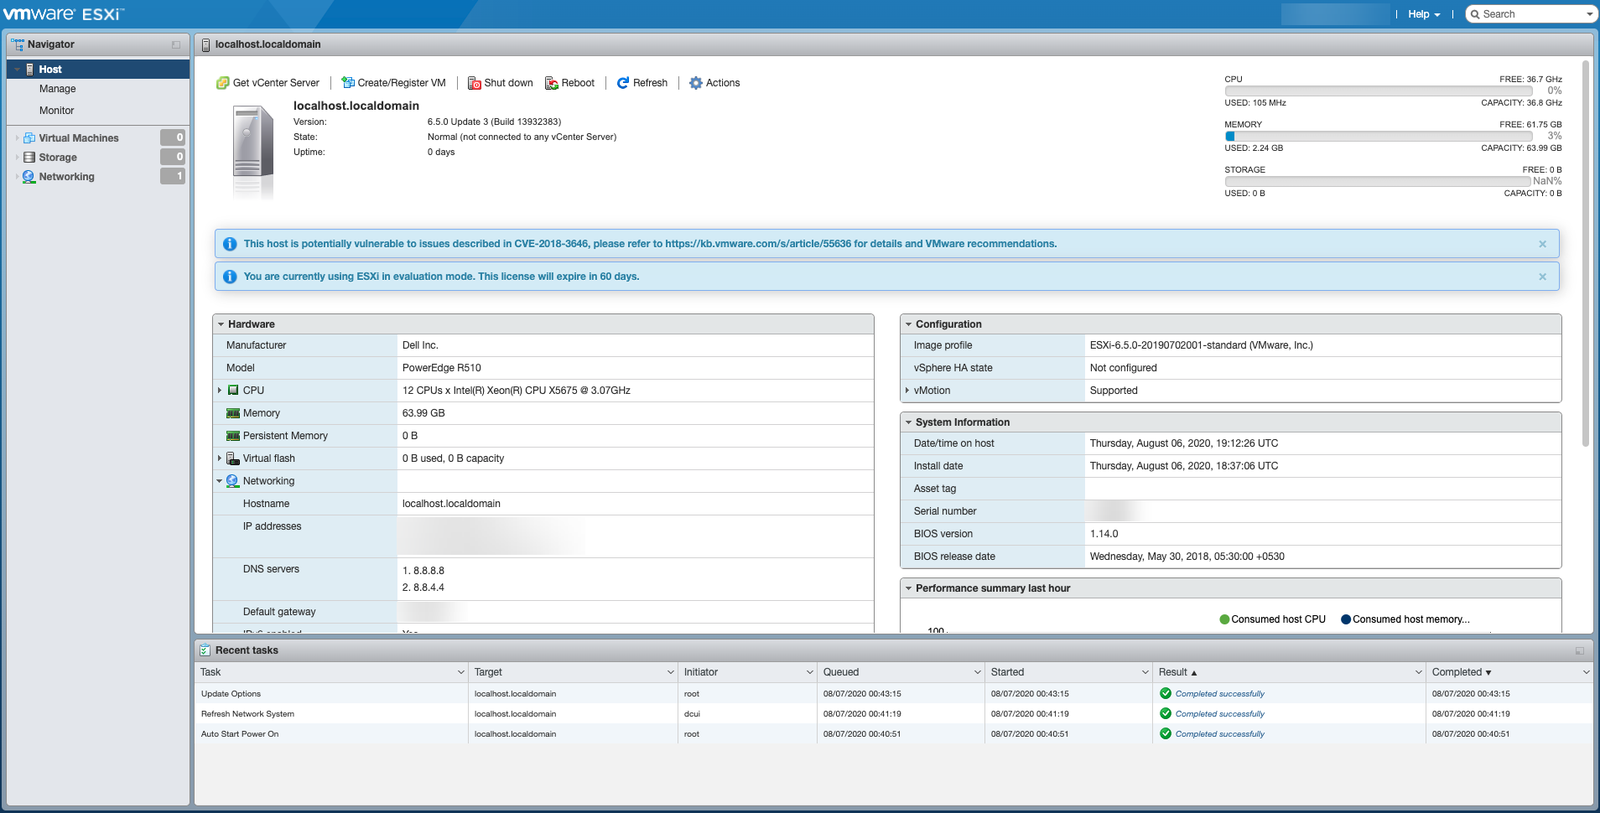 ESXi 6.5 host summary for the R510, 6 August 2020. I blurred the IP addresses and the service tag.
Proxmox is on the list too. On 10 August I downloaded a RancherOS ISO built for Proxmox VE, so that’s up next.
If you’re buying an old R510
Four weeks in, here’s what I’d tell you:
- Check the RAID card first. If it’s an H310 and you want ZFS, plan for the IT-mode crossflash, read techmattr’s warnings before you start, and keep that SAS address written down.
- Test the RAM before you trust it. Dell’s MpMemory diagnostic was the first thing I ran.
- Keep a VGA monitor around. Mine is a CRT from the garage, and it did the job just fine.
- Look at what firmware is already on it before you go hunting for downloads. Four days after the first boot, ESXi’s host summary told me mine already had BIOS 1.14.0.
Did you ever run a rack server without a rack? Tell me in the comments!
Keep reading
Project #3: Create a PirateBox (BitTorrent) | Raspberry Pi 2
Create your own low-powered always-on PirateBox using your Raspberry Pi. Let storm over the bits & bytes of BitTorrent as we know it. #KeepSeeding
Project #2: Create your own LAMP web server | Raspberry Pi 2
Discover how can you setup your own LAMP stack on your Raspberry Pi 2 & host your personal website or blog for the world to marvel at? Just dive in!
Project #1: Create a Network attached storage | Raspberry Pi 2
Discover how you can create your own Network Attached storage (NAS) within 30 minutes using a Raspberry Pi 2. Say goodbye to intranetwork data sharing woes!
Leave a comment