Zion, part 1: one man's trash is another man's homelab
An HP Envy left in my building's garbage room with a 'Free for parts' note is now Zion. Part 1: the rescue, the drives, a 3D printed cage and a stubborn PSU.

In early October I found an HP Envy 750 sitting in my building’s garbage room with a post-it on it saying “Free for parts”. Took it home, blew out a scary amount of dust (the CPU heatsink and the rear fans were the worst), checked the wiring, swapped the dead CMOS battery and it booted straight into BIOS. So yeah, it’s a homelab now. I’m calling it Zion.
Starting from zero, again
I’ve had a few labs before. A couple of Raspberry Pis, an old gaming PC, and a Dell R510 that sounded like a jet engine. My last setup was Proxmox with TrueNAS in a VM. Then I moved to the US and had to start from zero. Apart from drives and a few small parts, this one cost me nothing.
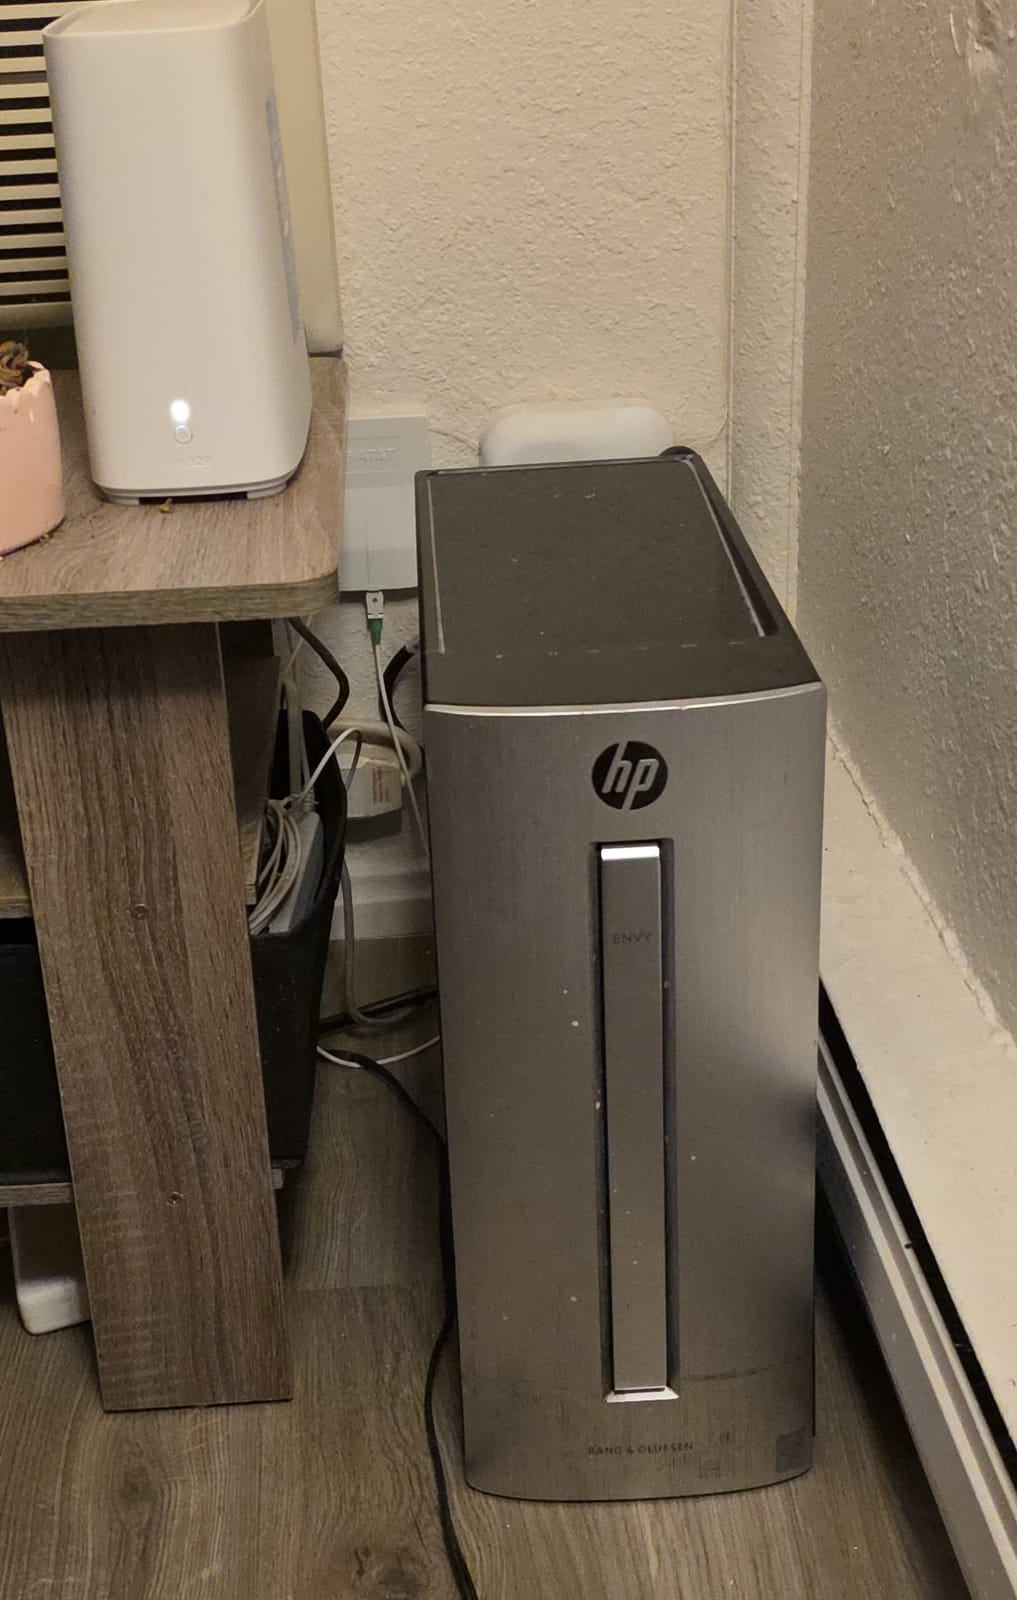
What’s inside
The spec sticker was scratched up but still readable.
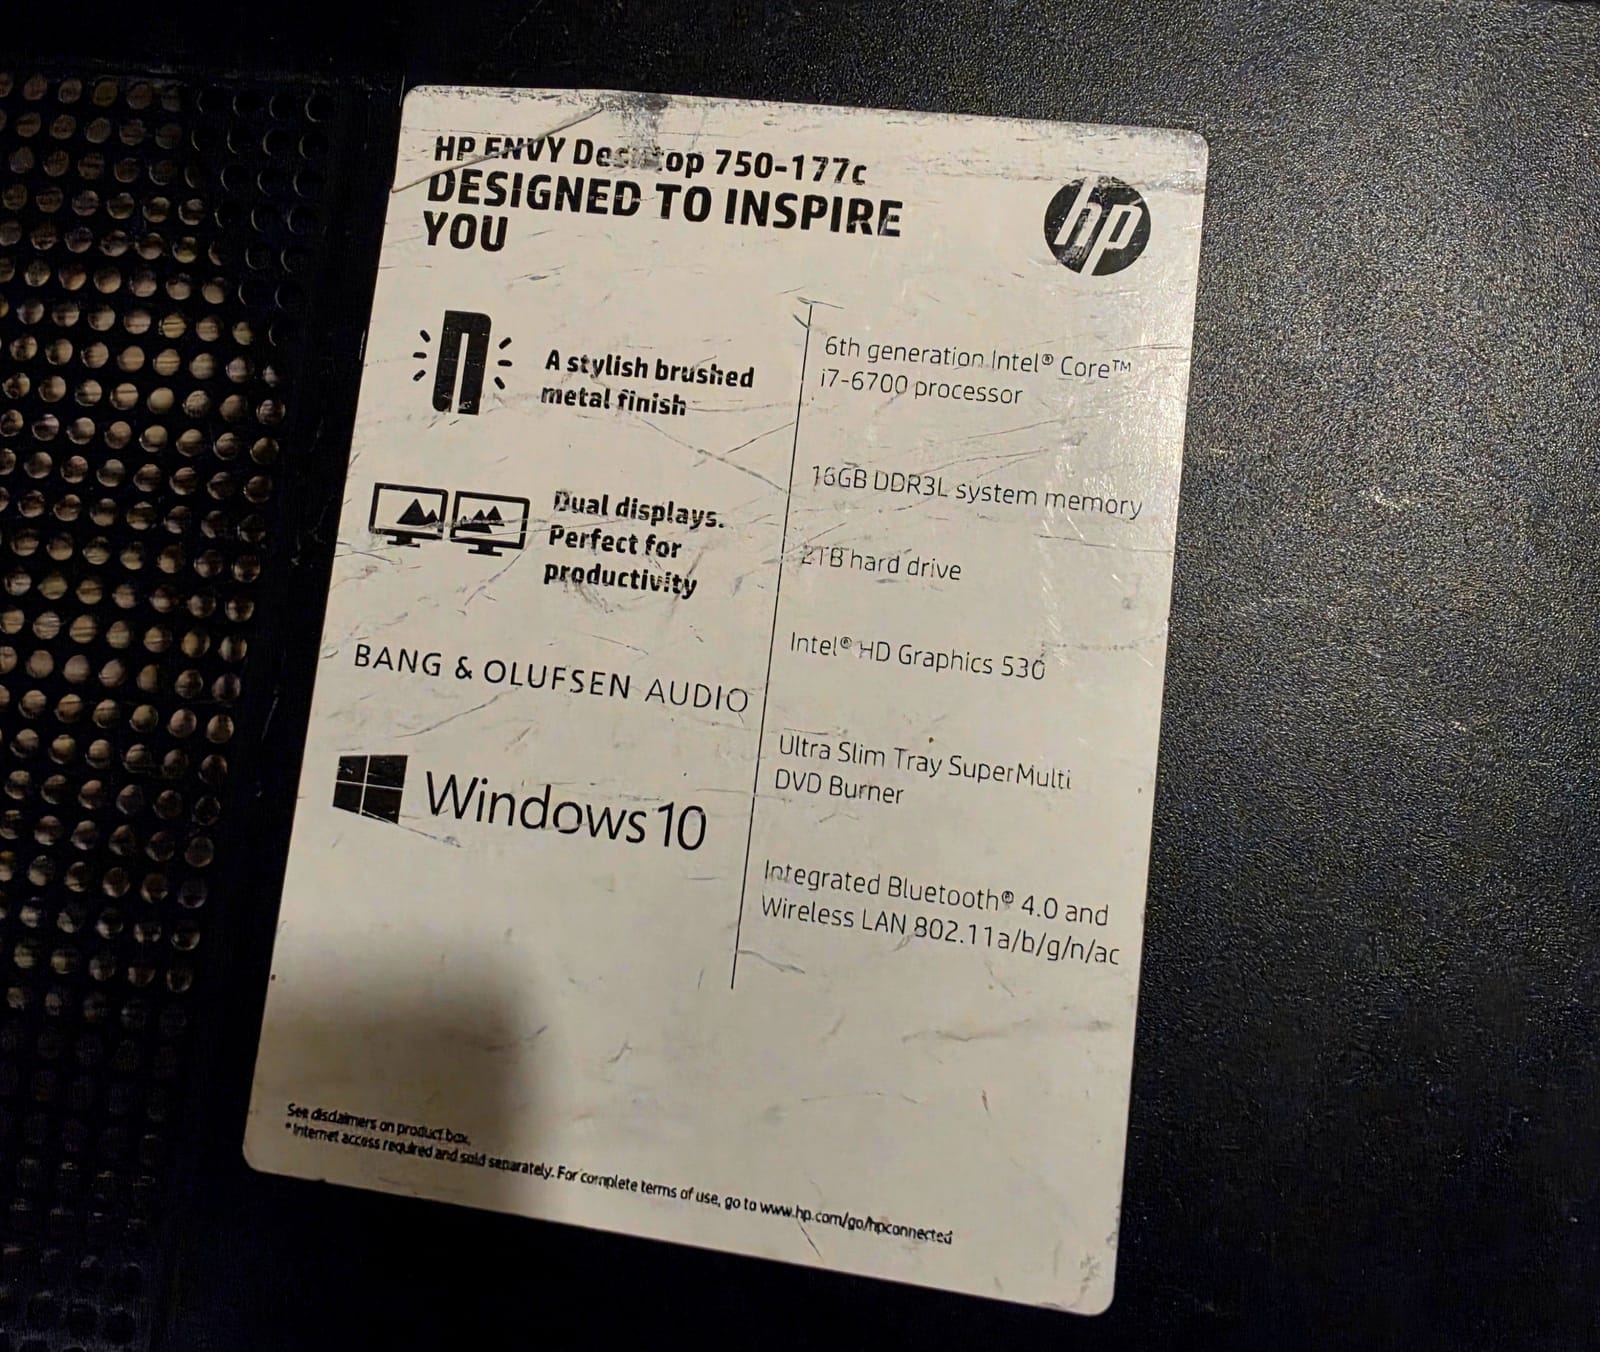
- HP Envy 750-177c on HP’s own IPM17-DD board
- i7-6700 (Skylake, 4C/8T, 65 W)
- 16 GB DDR3L, non-ECC
- Intel HD 530 iGPU
- The stock WD Green 2TB HDD
- Gigabit LAN, which was a nice bonus
- The stock 300W HP power supply
- A front power button that doesn’t work, so I turn it on by shorting the header pins like a caveman
In the BIOS I turned on power-on after a power cut, and Wake-on-LAN.
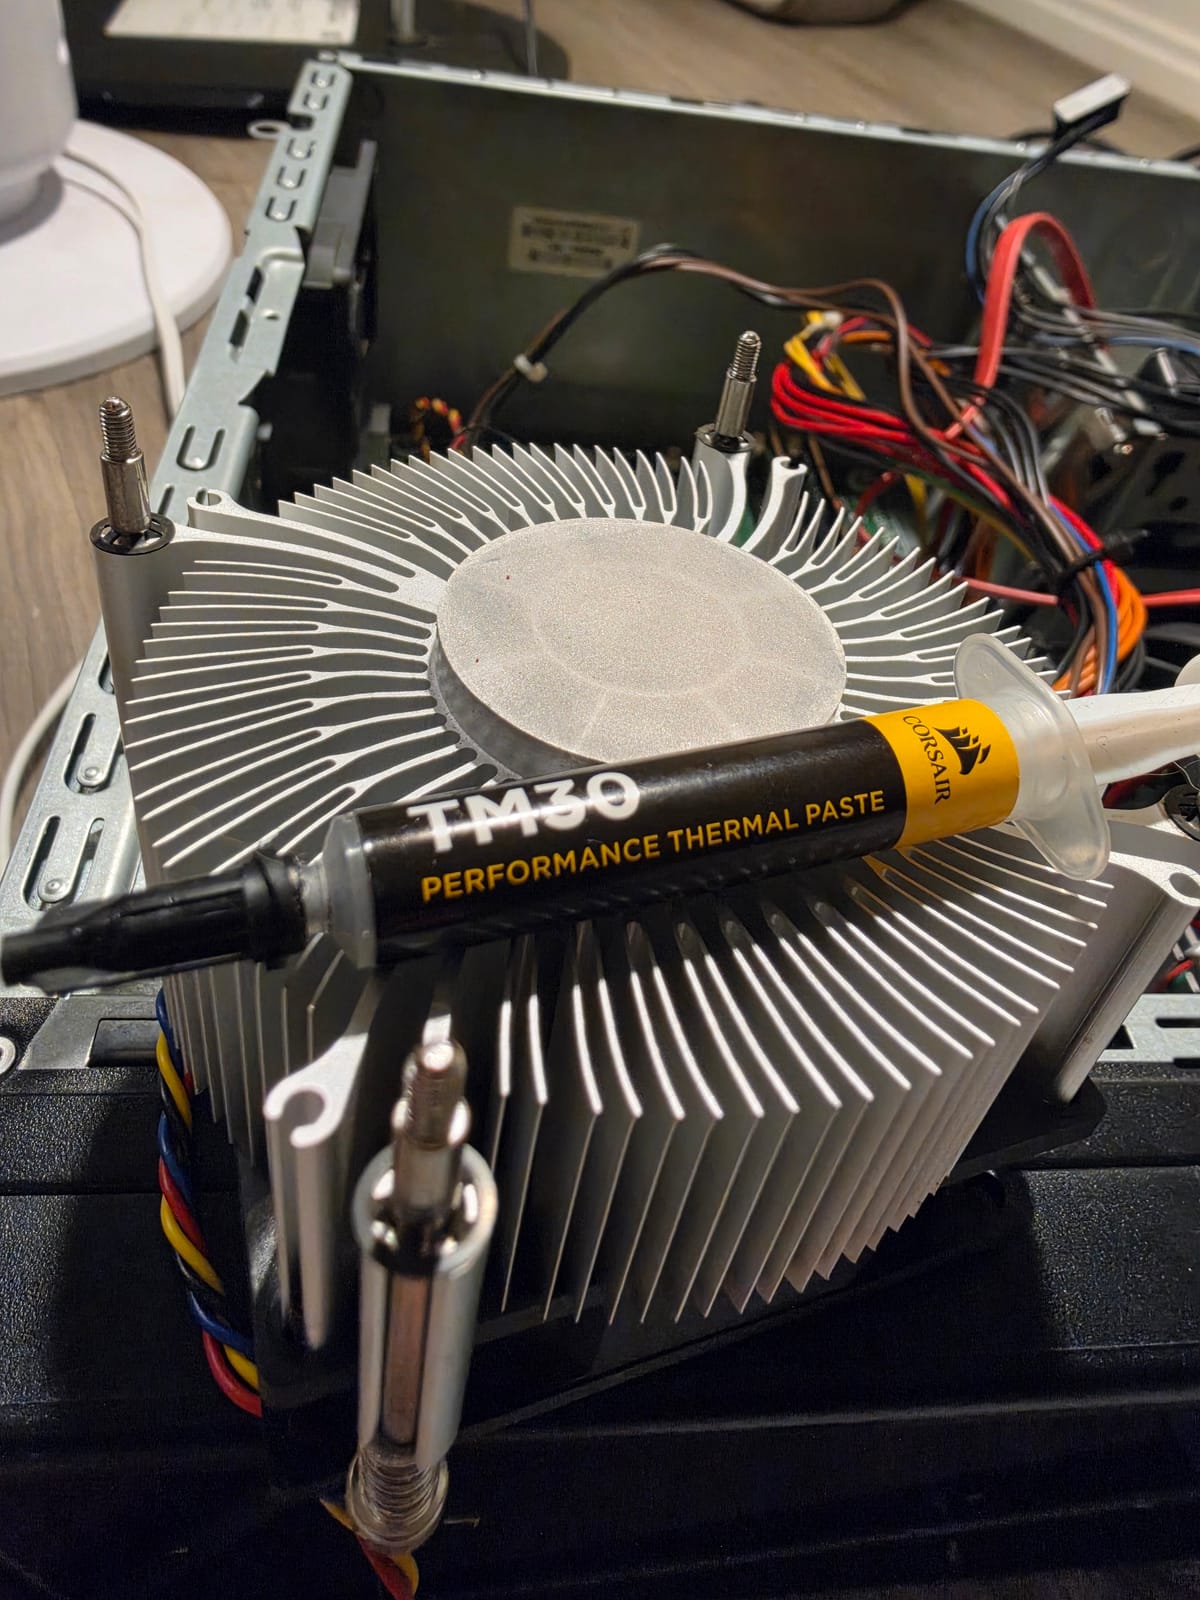
Before installing anything I repasted the CPU with Corsair TM30 left over from my last gaming rig.
Quick Sync, and why the GTX 960 stayed in the box
The HD 530 does Quick Sync for H.264 and 8-bit HEVC, which covers Plex, Immich and a batch HEVC re-encode (part 2). 10-bit HEVC and AV1 fall back to the CPU.
I have a spare GTX 960 that would add 10-bit HEVC decode, and I left it out. It would eat the only x16 slot, needs 6-pin power from a 300W OEM supply (if it even has the cable), is stuck on legacy NVIDIA drivers, and adds heat. If I ever need 4K HDR transcoding I’ll revisit it.
Three SATA ports and an M.2 slot that isn’t
This is where you can tell it’s an OEM board. There are 3 usable SATA ports. A fourth spot on the board has no connector soldered on, and the DVD drive was using one of the three.
M.2 is worse. The one M.2 slot is a key A slot with the Wi-Fi card in it. There’s a second M.2 footprint, also with no connector soldered on, and from what I read PCIe-to-M.2 adapters don’t boot on this BIOS anyway. So no SSD. The boot drive is the stock WD Green HDD. It’s slow, but it’s still a lot more durable than booting off a USB stick.
The SATA card saga
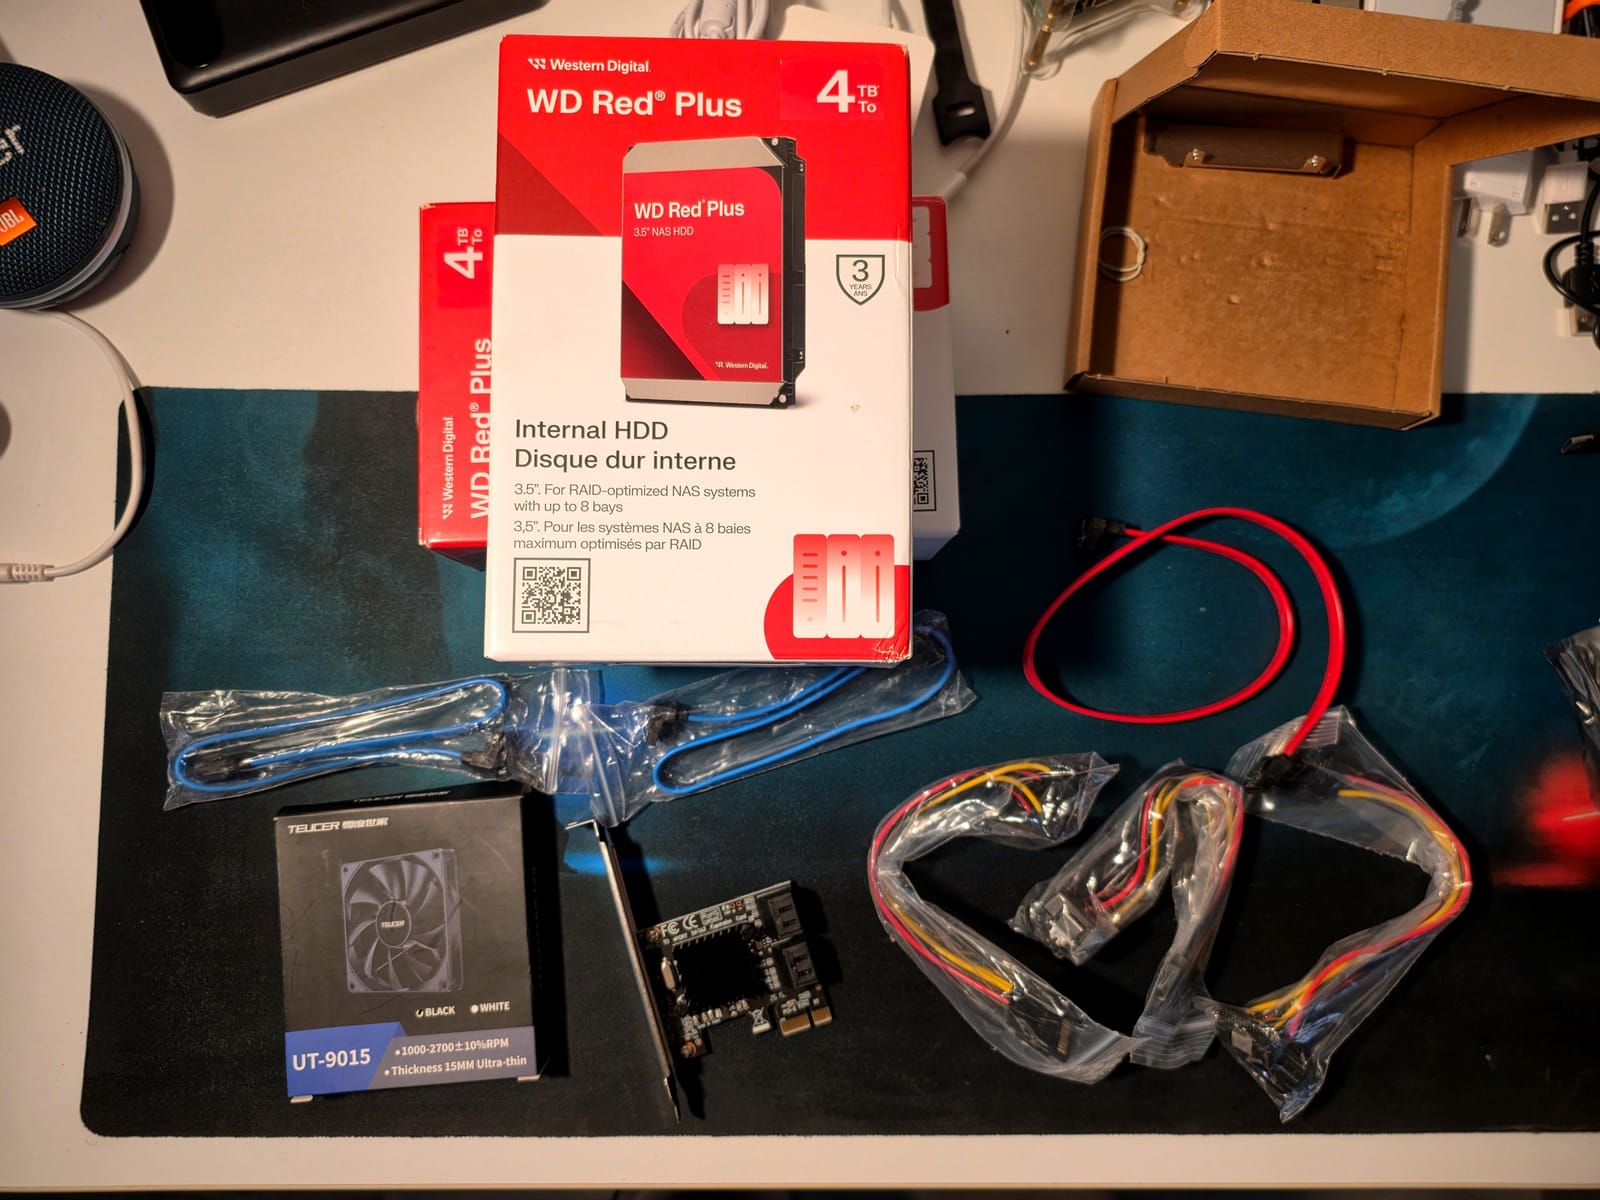
That leaves PCIe: the x16 slot (free) and an x1 slot. The x1 got a SATA card. The plan was an ASMedia ASM1064 or ASM1166, and the one hard requirement was no port multiplier. What I ended up with from a Micro Center run was a JMicron JMB585 (5 ports, AHCI, no port multiplier), and it carried the old pool for its first few weeks.
Later I swapped it for a Marvell 88SE9215 (PCIe 2.0 x1, 4 ports, plain AHCI, no port multiplier). The disks came up at 6 Gbps and ZFS, importing by disk ID, didn’t care about the new controller. What did break was the IP. After the swap the router handed Zion a different one, Caddy couldn’t bind to its old address and every site went down at once lol. A DHCP reservation fixed it for good.
The old pool comes back to life
I also had three 2TB drives (2x WD Blue and a Seagate, all SMR) with a RAIDZ1 pool from my old server. It had been sitting in a box since I moved countries. The last scrub on it was January 2023.
At first I could only hook up one of the three, through the DVD drive’s SATA cable, because I had nowhere to plug in power for the others (more on that below). Funnily enough, past me had also named that pool “zion”. With 1 of 3 disks it showed up as UNAVAIL, so I had to wait for a power splitter from AliExpress.
Once all three were in, it imported (with -f, since another system had last used it) and came up ONLINE. ZFS fixed one checksum error on the Seagate during the import. Then I ran a scrub, which took 8 hours 42 minutes on these SMR drives, repaired 4K and finished with zero errors. Everything was still there: 880 GB of movies, 1.8 TB of TV shows, my comics and the YouTube courses folder.
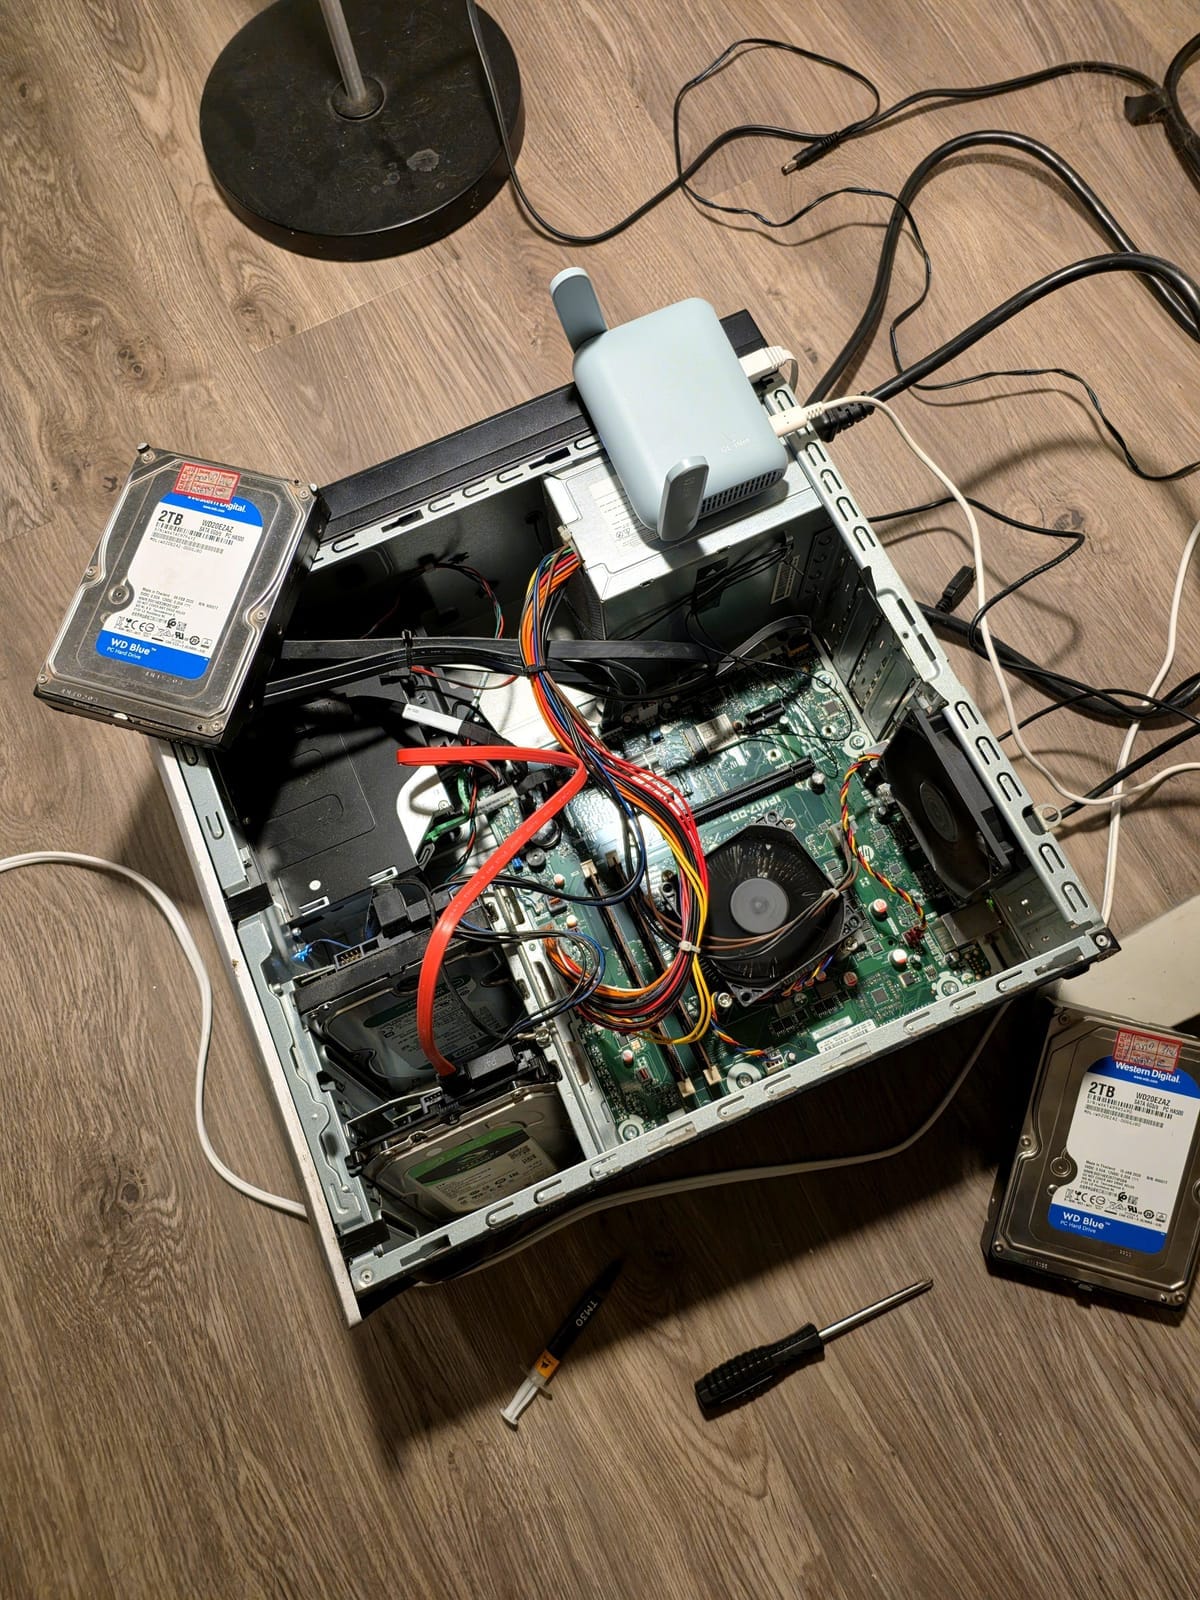
SMART was mostly fine. The Seagate has 1,480 old CRC errors, but the count hasn’t moved since I put in new cables. The two WD Blues are at around 656k and 683k load cycles against a rating of about 300k, because they love to park their heads. They’re fine for media and second copies, but nothing I can’t replace is going on them.
Seven drives, room for four
Counting everything, I have 7 HDDs:
- The WD Green 2TB boot drive
- The three 2TB drives from the old pool
- 2x WD Red Plus 4TB (CMR)
- A 4TB I shucked out of a WD My Book
The case fits 4. I was about to buy an enclosure and then remembered I own a 3D printer and I can just do things. Below is the first draft, printed in translucent green PETG. Yes, it’s a monstrosity 💀
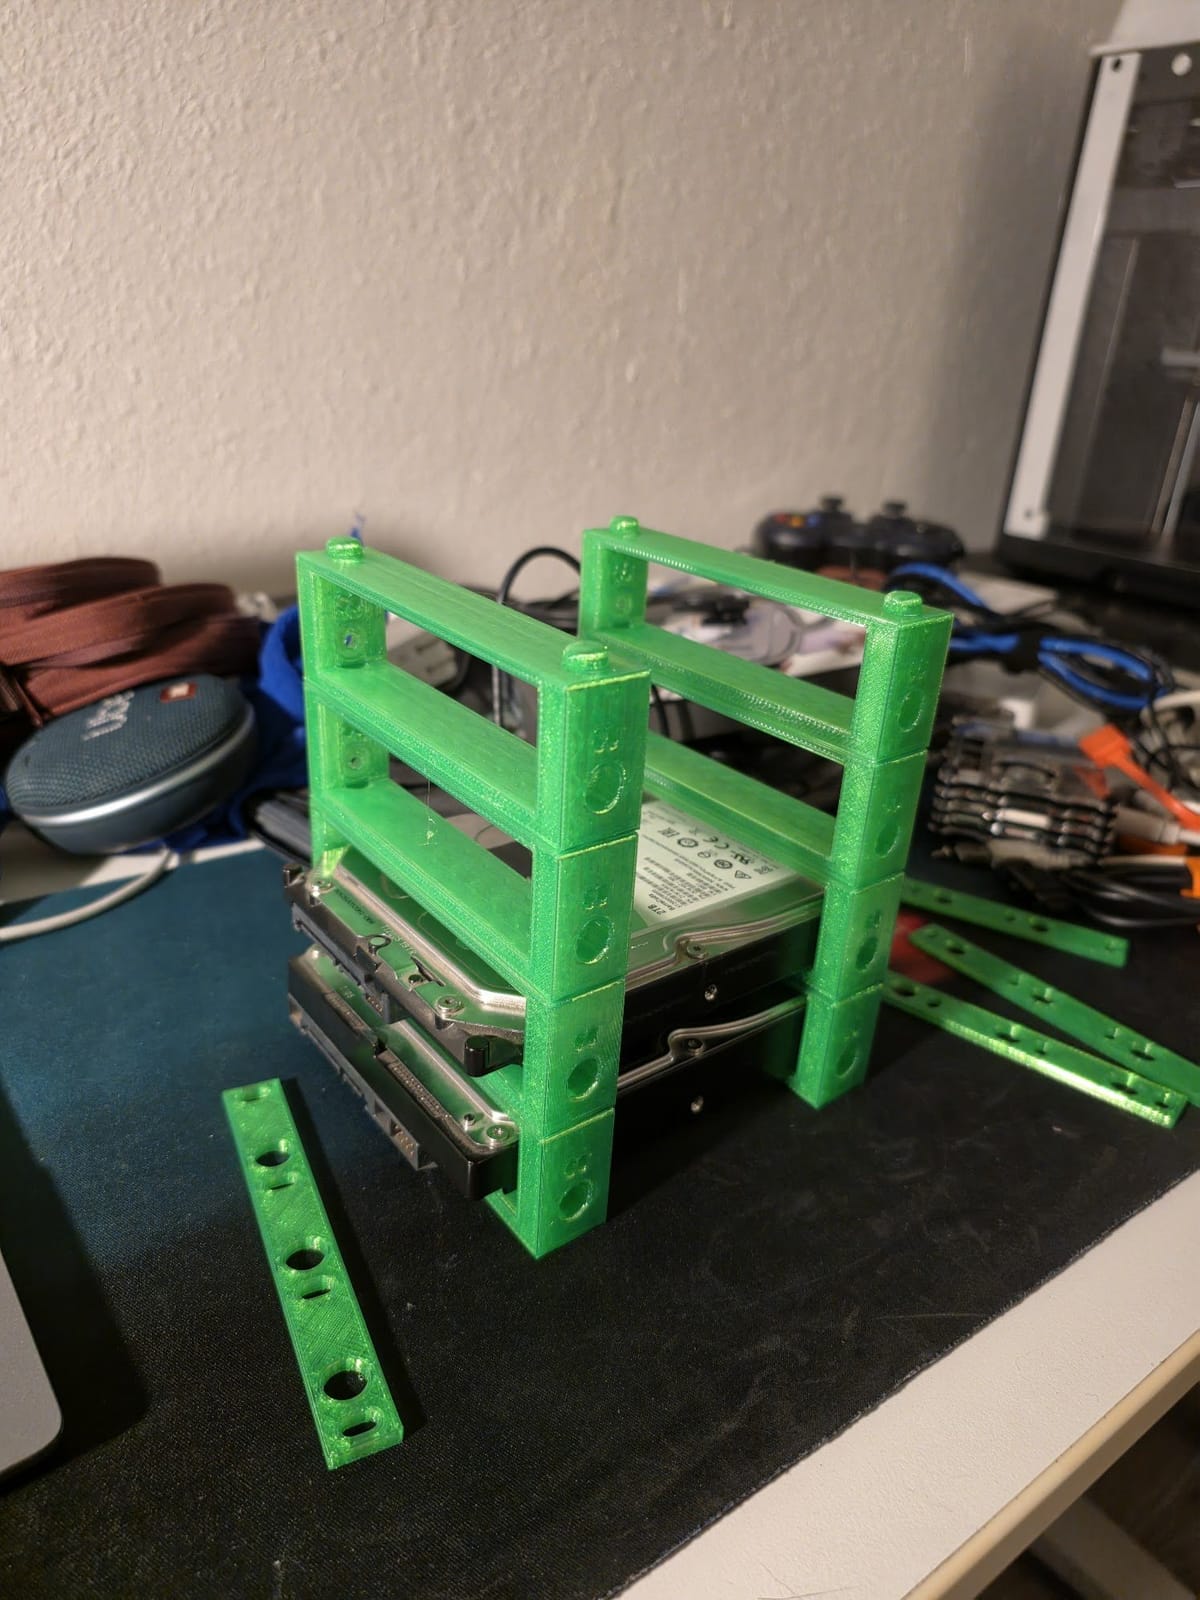
The early designs were sloppy. When I checked them against the actual drive spec (SFF-8301), the side screw holes were at mid-height, 10 mm from the front. On a real drive they’re 6.35 mm above the PCB face and 28.5 mm from the connector end, so not one hole would have lined up with a drive. The fan plate also sat right over the SATA plugs.
So v2 is a proper parametric design in OpenSCAD. It’s a 3-drive cage (155 x 112.8 x 98.1 mm) that goes where the slim DVD drive is now, with an 80mm fan on the front, an open back for the SATA cables, 12 side screws at the real SFF-8301 positions, and counterbores so standard 6-32 x 1/4” screws bite about 2.8 mm. The ledges are chamfered so it prints without supports.
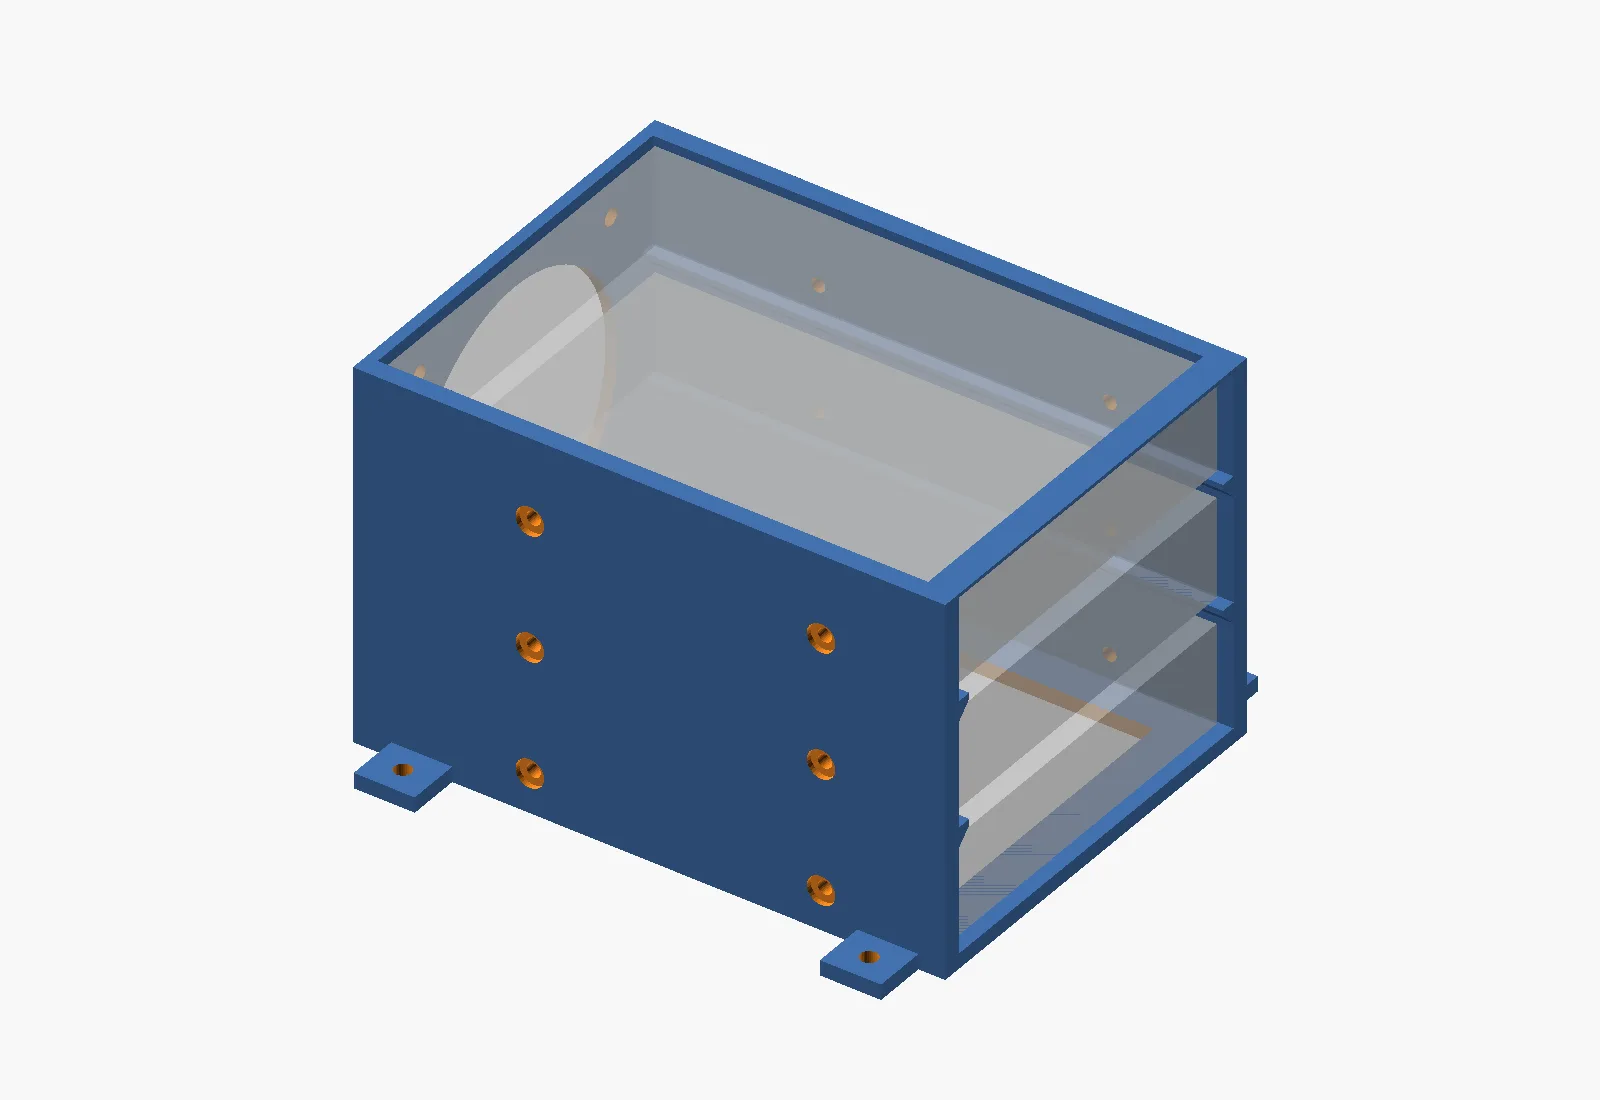
There’s also a flat tray for one more drive. Between the bottom edge of the motherboard and the case floor there’s a gap of roughly 40 mm, and a 3.5” drive lying flat is 26 mm tall. The tray holds it PCB-down, screwed from below, on rubber feet, zip-tied to the floor vents. It needs at least 36 mm of clearance, so that gets measured first.
v2 isn’t printed yet. The numbers so far come from HP’s specs and photos, not a ruler, and the cage plus fan (about 180 mm) looks longer than the bay is deep (about 125 mm). Before burning 8 to 12 hours of PETG, I’m going to hold a cardboard box cut to 180 x 113 x 98 mm where the cage goes.
One mystery: under the slim DVD drive there’s a black sheet-metal box I assumed was a 2.5” cage. A teardown of the ENVY 750se (same chassis family) says it’s a 4th tool-less 3.5” bay that loads from the front. I haven’t confirmed it on mine. Either way it comes out for the printed cage, and hopefully its screw holes become the cage’s mounting points.
The actual problem: power
Then I hit the real wall, which is the PSU. It’s a Chicony unit made for HP, 300W, with two 12V rails (12A and 16A). It’s fine for 4 drives. The trouble is everything around it:
- It has a custom HP motherboard power connector, so I can’t just swap in a normal ATX supply.
- It has exactly one SATA power cable.
- The DVD drive’s power plug is a slimline one, useless for a 3.5” drive.
I’m already splitting that one cable to run 4 drives (boot plus the 3-disk pool). What I learned about splitters: avoid molded ones (the connector is one solid block of plastic, a known fire risk), and I passed on one listing just because it said “molded connectors”. Get crimped pins or the flat ribbon kind with press-on connectors, like SilverStone’s CP06-E4. Don’t hang more than 2 drives off one PSU plug. And watch the first power-on, because spin-up is when the drives pull the most.
There’s no sane way to hang 3 more drives off that one cable. The cage can hold them but I can’t power them.
Where I’m stuck: the second pool
The old 2TB pool is fine for media and Linux ISOs. I want a second ZFS pool on the three 4TB drives for the stuff that actually matters (all three are CMR: the two Reds, and I checked the shucked one too). Photos are the big one. Immich lives on the single boot drive right now and Google Photos is the only other copy. Because of the PSU, those drives can’t go inside Zion. Options I’ve been looking at:
- A 4-bay SATA HDD enclosure with its own power supply, connected to Zion over eSATA. Cheap and everything stays on one box. I’d need an eSATA card or bracket though, and I’m not sure how I feel about ZFS on an external enclosure, especially if it uses a port multiplier.
- The Beelink ME Pro N150 on Kickstarter, which I’ve backed for now (with the deposit that upgrades it to the 4-bay chassis). 16 GB RAM (soldered), 5GbE plus 2.5GbE, native ZFS, low power. Zion would stay the compute box and its 2TB pool would become the backup target. But it’s more money, it ships in December, and it’s Kickstarter hardware. The campaign ends December 5, my last chance to cancel for free, so that’s my real deadline.
- Something I haven’t thought of. A proper ATX PSU with an adapter for HP’s connector? A used SAS HBA and a DAS?
I’m torn on this. If you were building a pool for data you can’t replace, which way would you go? And if you’ve had this Envy chassis open, is that box under the slim DVD bay a 3.5” bay or a 2.5” cage? Tell me in the comments.
A note on AI help
The OpenSCAD cage and tray, the check against the drive spec, and a lot of the research (SATA cards, splitters, the chassis teardown) were done with a lot of help from Claude and other AI agents. The agents did a lot of the typing. I made the calls and held the screwdriver, and I checked everything that went in.
Next up is the software: about 40 containers, Tailscale-only access and the VPN setup.
Keep reading
Raspberry Pi 2 - Model B 1GB | All you need to know
Planning to buy a Raspberry Pi 2? Or have a spare one lying around? This is the Wiki post for you. Learn how to set it up & make interesting DIY projects.
My new hard drive ritual: badblocks, TLER and the SMR check
What a new hard drive goes through before it joins my NAS: a badblocks burn-in in tmux, TLER via smartctl, and the CMR, SMR and shucking checks.
A rack server with no rack: my Dell PowerEdge R510
Two Xeon X5675s, 64 GB of ECC RAM, a PERC H310 crossflashed to IT mode and a CRT for a console. My first month with a Dell R510.
Leave a comment